
Step outside on a clear night, and the twinkling of thousands of stars will greet you. About 4,548, to be precise, based on what you can see with your naked eye (depending on the season).
While they’re certainly pretty to look at, stars also have a more practical side to them as well. Explorers across the millennia have depended on celestial navigation to help them figure out where they are and where they’re going. And with a few basic skills, you can also learn how to navigate by using the stars, allowing you to find your way even in the direst circumstances.
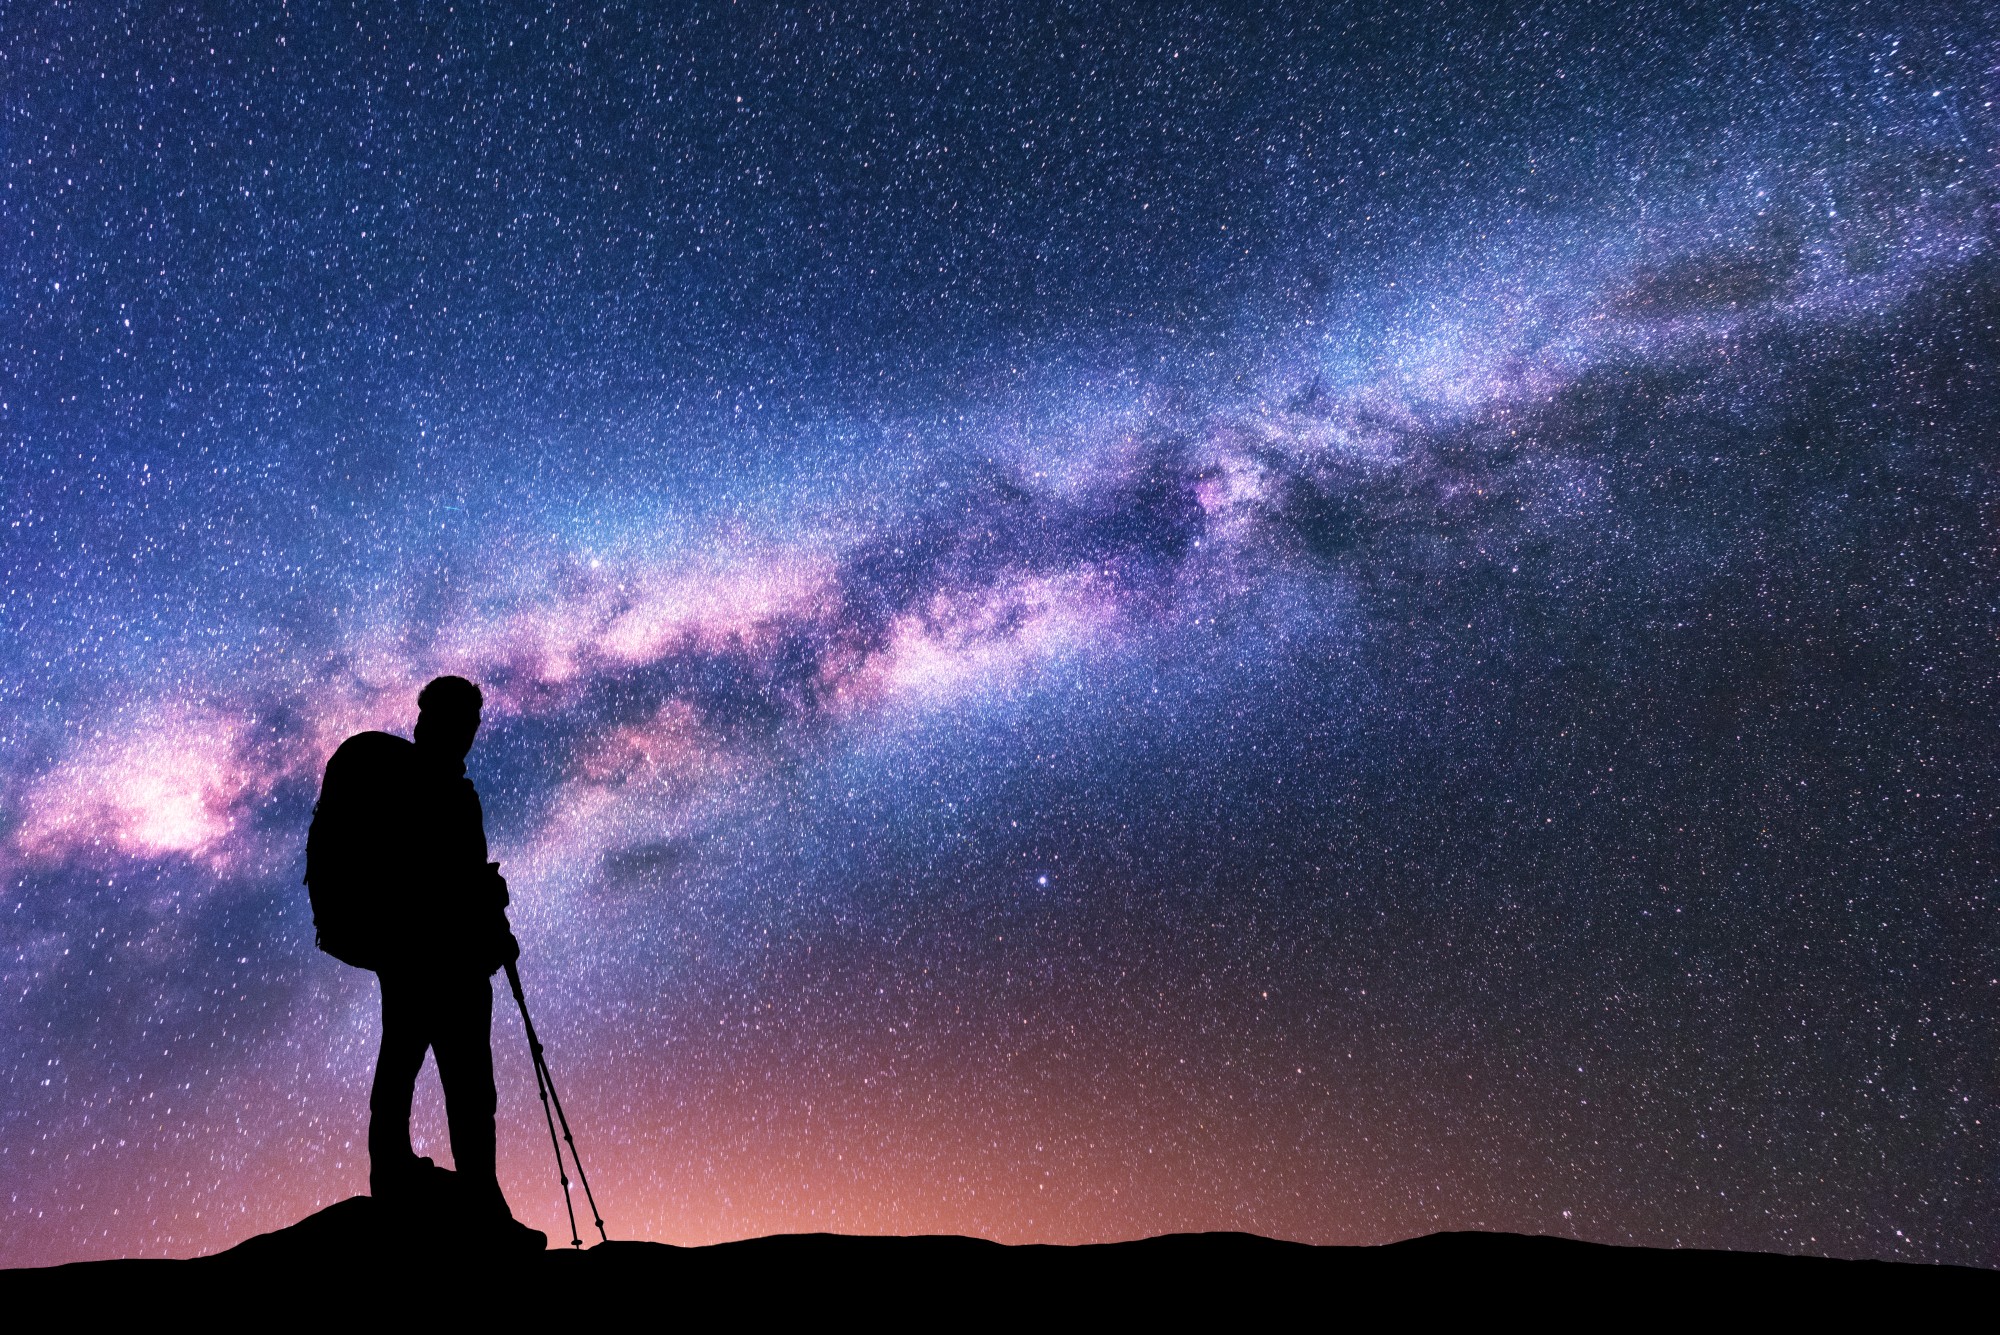
With a few basic skills, you can learn how to navigate by using the stars. Photo: shooarts via Shutterstock
Some of the links in this article may contain affiliate links. When you purchase using these links, part of the proceeds go to Snowshoe Mag. Additionally, as Amazon Associates, we earn from qualifying purchases. Please see our disclosure for more details.
Why Star Navigation Is Important
If you’re an avid camper, snowshoer, or outdoor enthusiast, you might be scratching your head at this one. After all, why would you ever need to know how to navigate using the stars?
Because let’s be honest, you’ll probably use your phone to determine your location. If you happen to run out of battery or you’re in a place without a signal, you’ll just pull out a map and compass for navigation. You did remember to pack those…right?
Think of celestial navigation as your backup to a backup. If all else fails, you’ll at least be able to figure out what direction you’re heading by looking at the stars above you. And if you’re feeling really fancy, you can even figure out your latitude and longitude by using a few simple tricks.
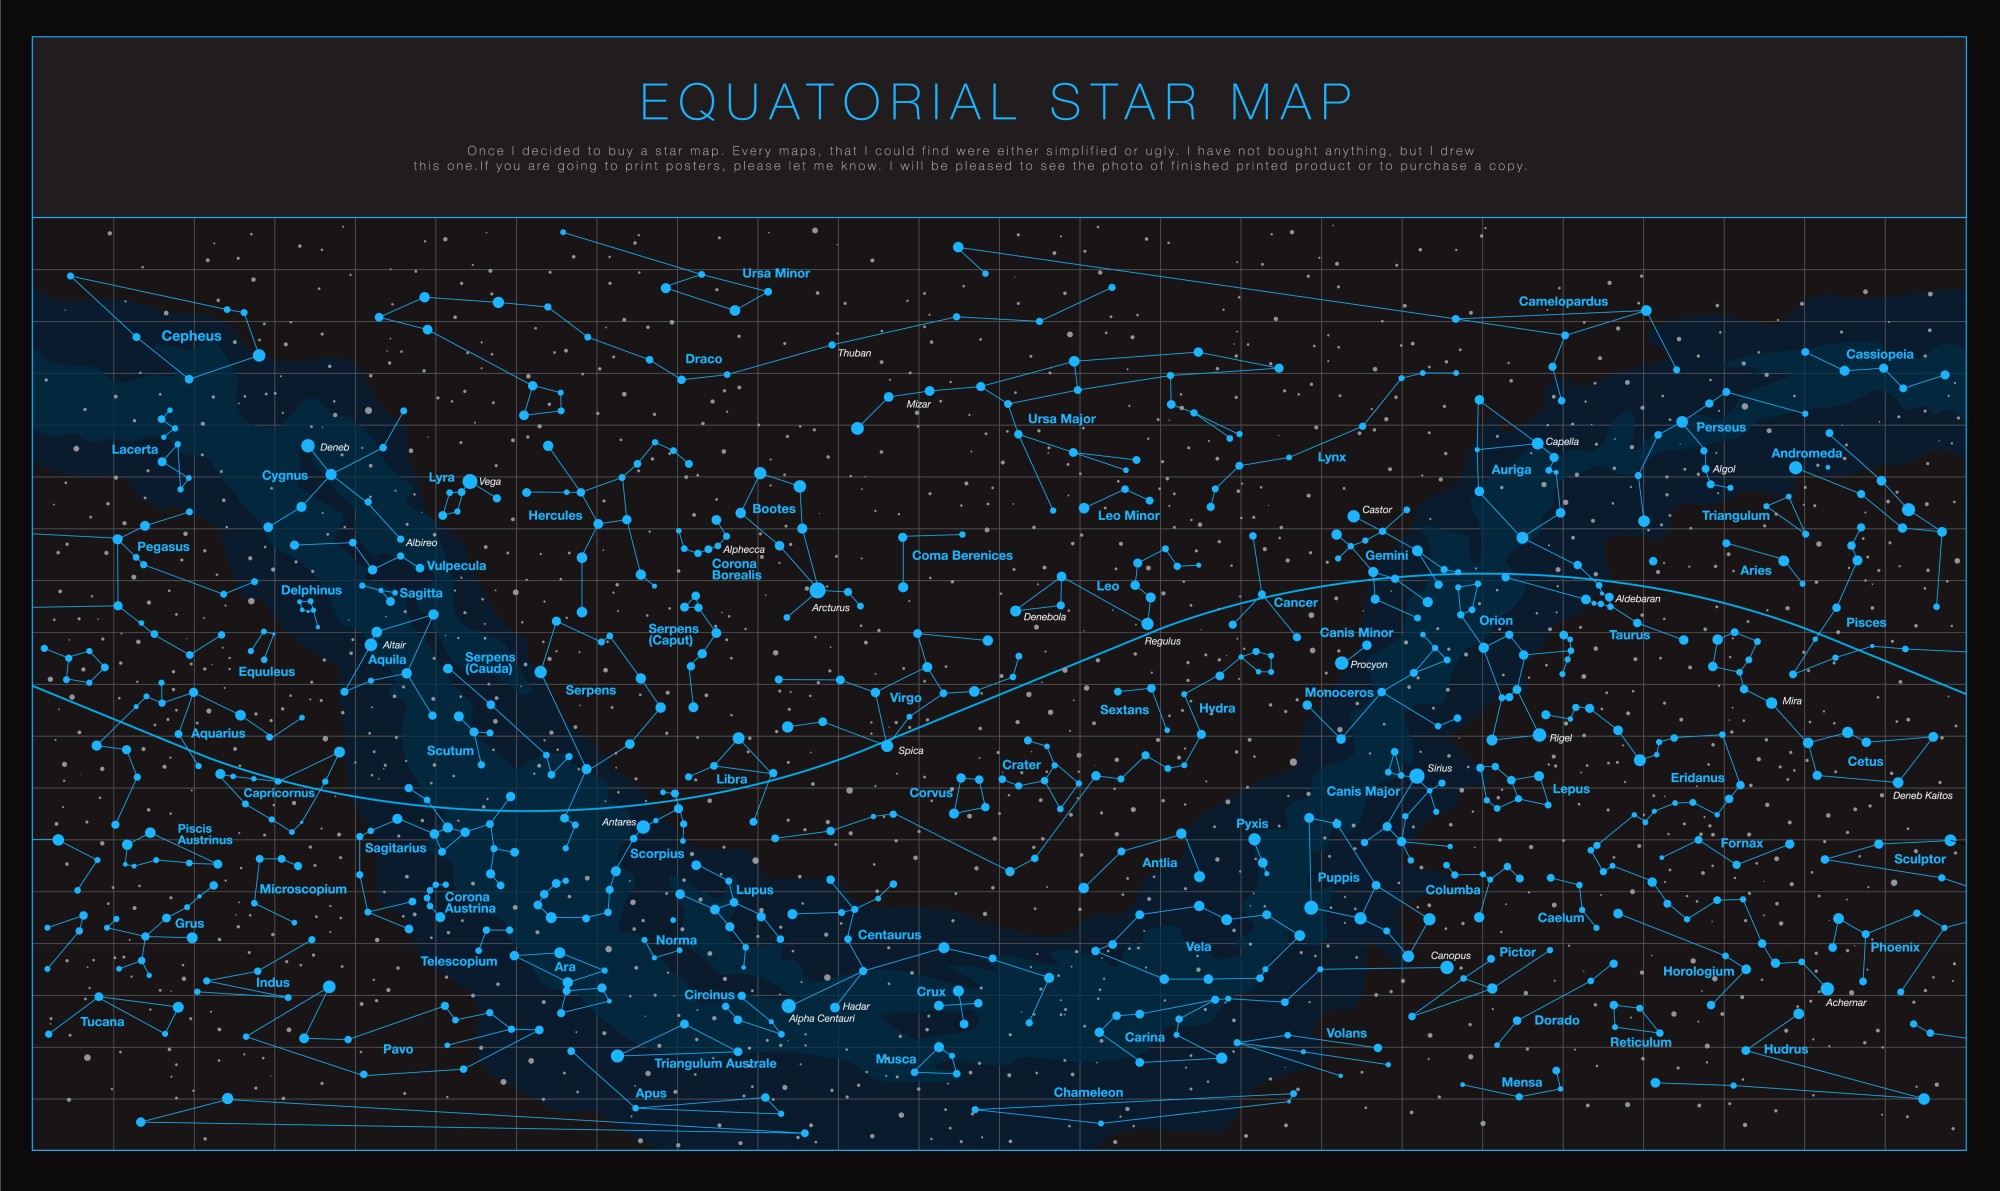
Notable Stars and Constellations
Before diving into the finer details of star navigation, I’ll give you a crash course on the celestial bodies you should be familiar with.
In total, there are 88 constellations in the night sky, as recognized by the International Astronomical Union. Thirty-six are predominantly in the northern hemisphere, while the remaining 52 are in the southern hemisphere. Don’t worry, though. You don’t need to know all 88 to navigate effectively. In fact, if you can locate 6 of them, you’ll be able to find your way, no matter where you are in the world.
Here’s a list of the key constellations you should memorize and the individual stars that give them their form.
Ursa Minor
Also known as the Little Dipper (or the Little Bear), Ursa Minor is an easily recognizable constellation because of its resemblance to a saucepan. But more importantly, it’s famous because it contains one of the most widely used stars in celestial navigation: Polaris.
Referred to as “the north star,” Polaris is the last star in the handle of Ursa Minor. It’s also the brightest in the constellation, making it a little easier to pick out. While most stars will travel across the night sky as the hours wax on, Polaris never really seems to move from its position. This fact is because it falls within a degree of the celestial north pole, so if you can spot it, you know that you’re facing north, regardless of what time it is during the night.
Read More: Snowshoeing at Night: How To Plan, Prepare and Navigate
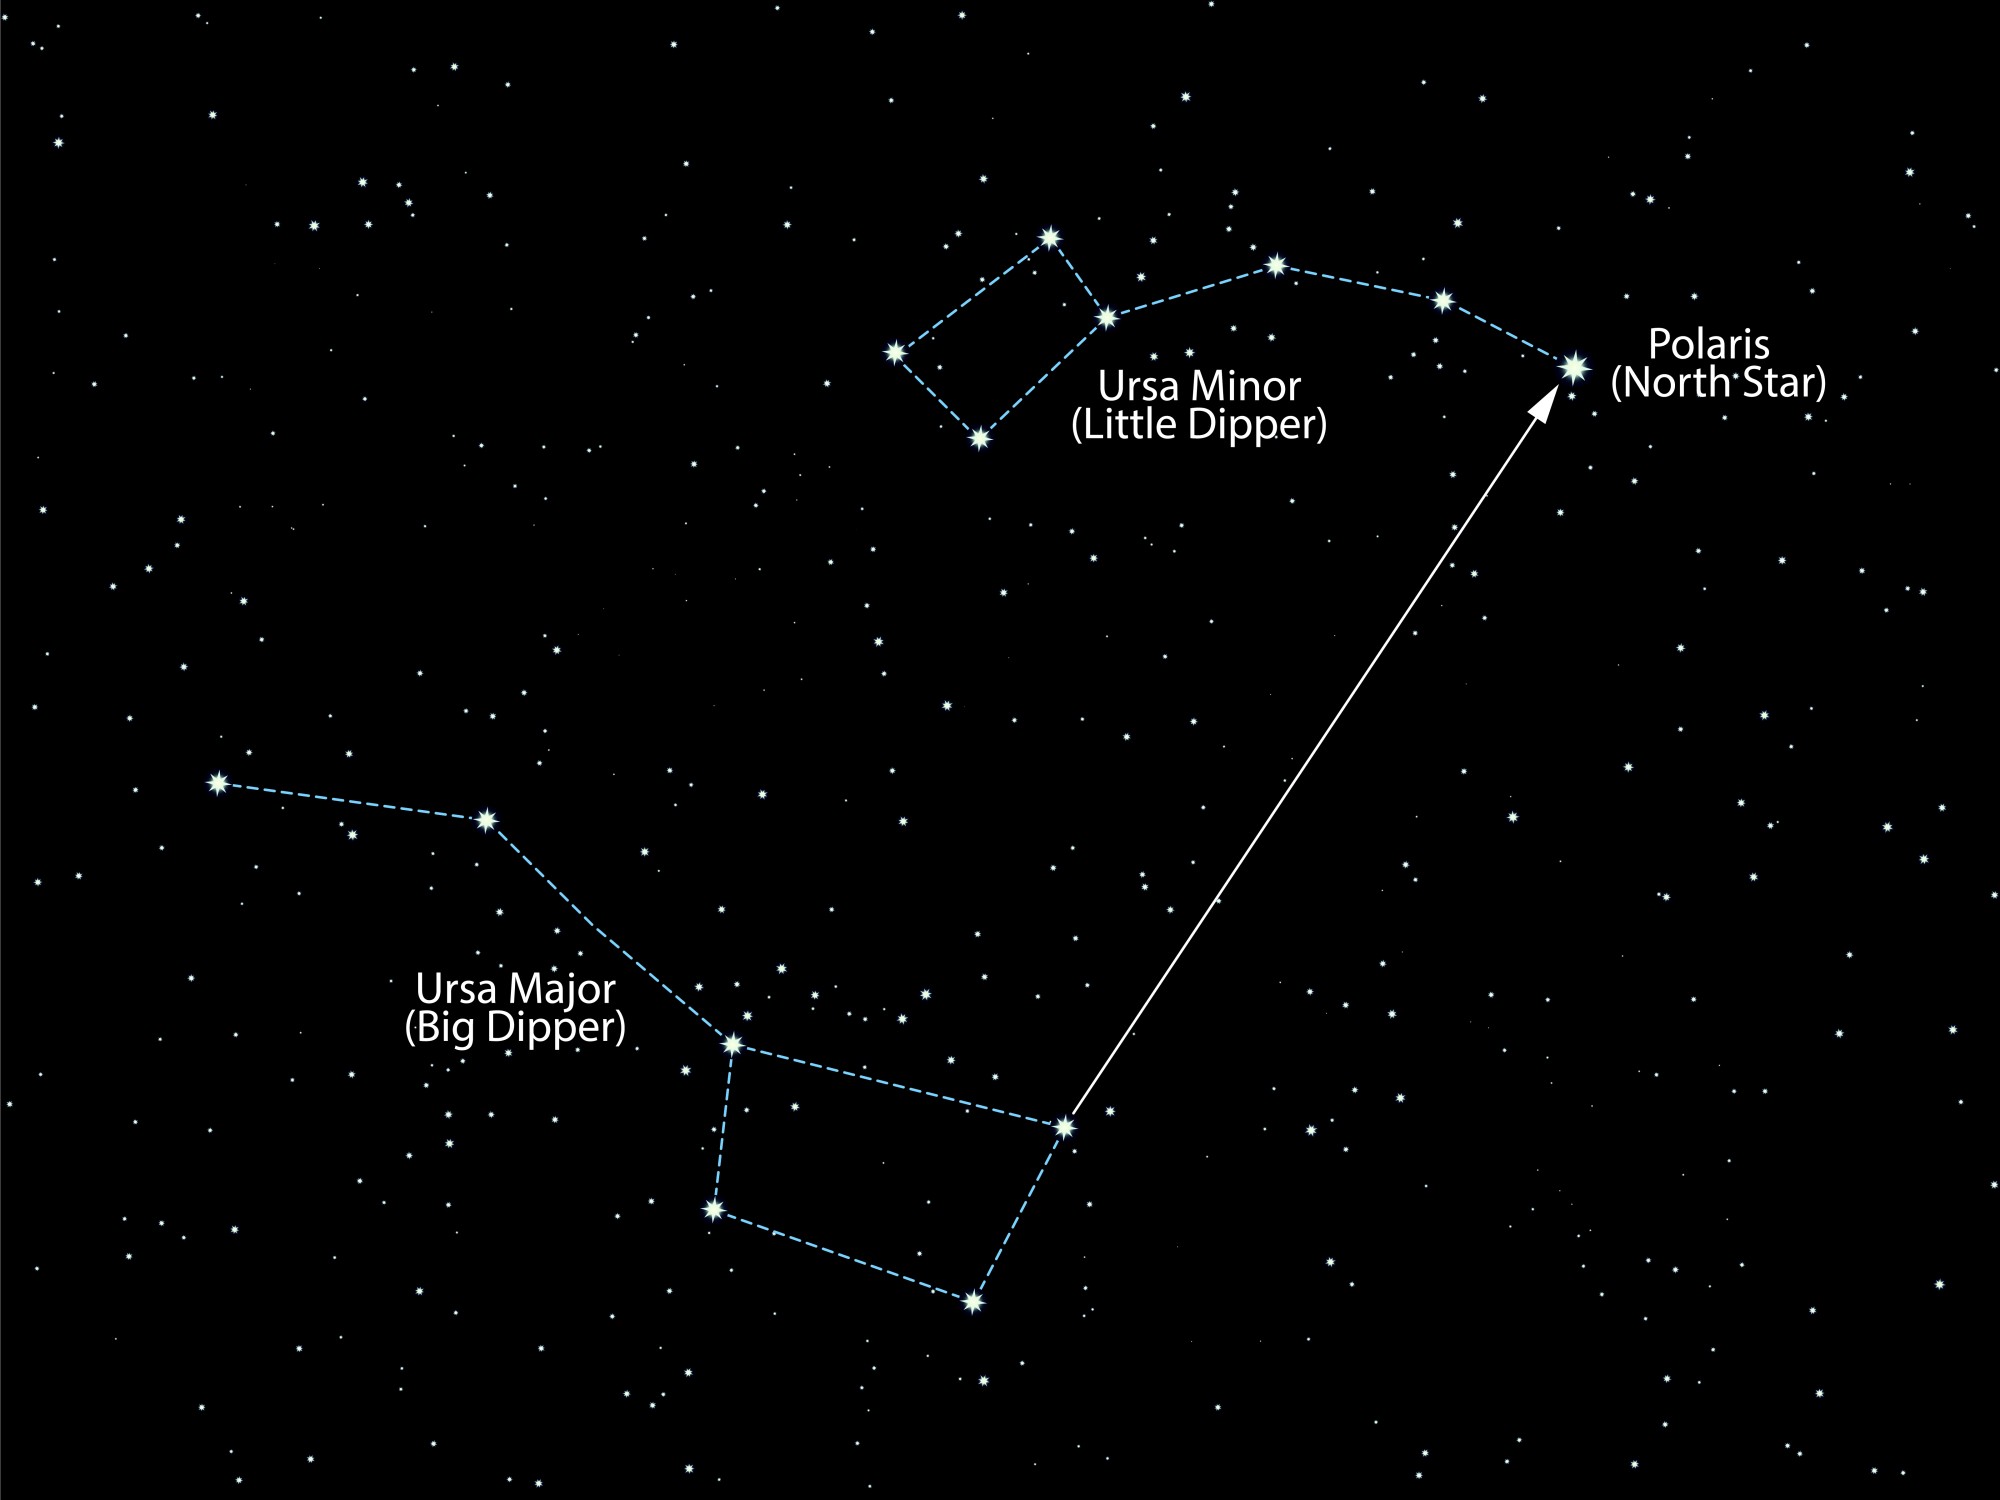
If you draw an imaginary line starting at Merak that travels through Dubhe (the far right stars of the Big Dipper), you’ll eventually reach Polaris. Photo: Vector FX via Shutterstock
Ursa Major
But how are you supposed to spot the Little Dipper when most of its stars are comparatively dim? It can be difficult, so you should always start by finding its larger counterpart – the Big Dipper – for star navigation.
The Big Dipper is identical to the Little Dipper, as they both consist of stars that create the same shape. However, the stars in the Big Dipper are much larger and brighter than those found in its smaller relative.
Once you’ve located it, find the two stars on the edge of the Big Dipper, opposite the handle. These stars are called Merak and Dubhe (Merak is the star in the bottom corner of the constellation, while Dubhe is right above it), and together they’re often called the pointer stars. If you draw an imaginary line starting at Merak that travels through Dubhe, you’ll eventually reach Polaris.
Cassiopeia
If the Big Dipper isn’t visible in the sky, you can still find Polaris using Cassiopeia as a reference point. Cassiopeia is shaped like a “W” or an “M,” depending on the time of year and time of day that you’re looking at it. It’s made up of 5 stars, one at each point of the W or M.
To find Polaris, take the middle three stars in Cassiopeia. They should form the shape of an arrowhead, which you’ll follow forward until you come across the North Star.
Read More: Basic Safety on the Trail
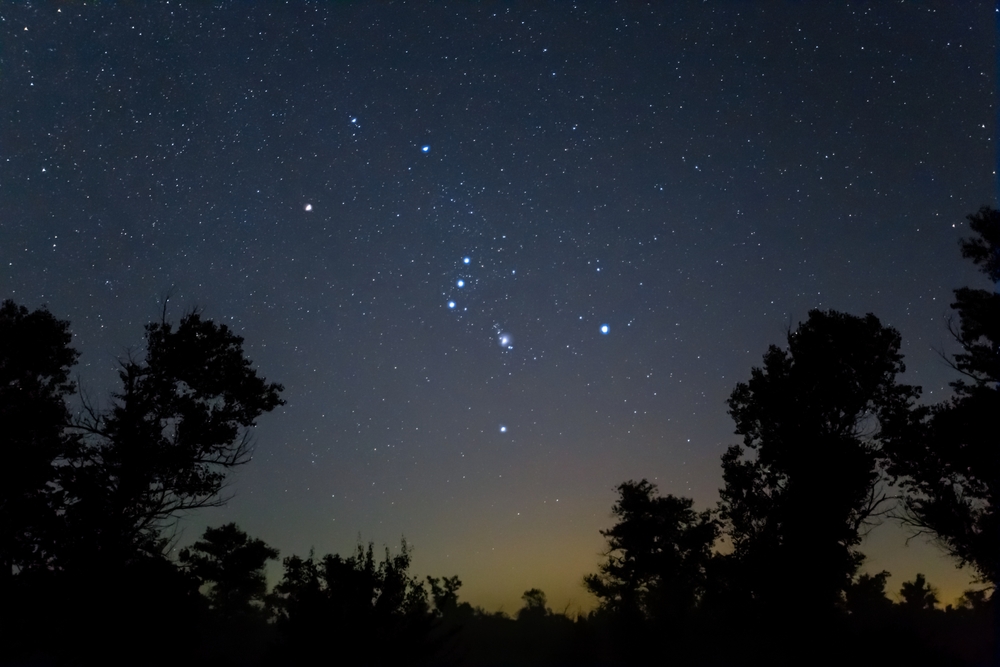
You can recognize Orion by the five stars that make up his head, shoulders, and feet and the three stars that make up his belt. Photo: Yuriy Kulik via Shutterstock
Orion
One of the most easily recognizable constellations in the night sky, Orion, forms the shape of a hunter holding a bow. The five stars that make up his head, shoulders, and feet are bright enough to be seen in most cities, and the three stars that make up his famous belt are even more apparent. In fact, these 3 (named Alnitak, Alnilam, and Mintaka) are the only set of bright stars that make a nearly straight line in the night sky.
Explorers used Orion for countless centuries in star navigation to determine east and west. The belt itself will be your most accurate reference point, but Mintaka, in particular, will always rise within one degree of due east, and set within one degree of true west, no matter where you are in the world.
Crux
Also known as the Southern Cross, Crux will be your most reliable method of navigating the stars in the southern hemisphere. Unlike Polaris, which focuses on finding north, Crux allows you to locate the South Celestial Pole.
In the sky, Crux looks like a cross lying on its side. To find due south, draw an imaginary line through the longer axis, extending it straight through the bottom of the cross. Keep going until your imaginary line is about four lengths of the axis away from Crux. This is the South Celestial Pole; from there, drop a vertical line down to the horizon. Congratulations, you’re now facing south!
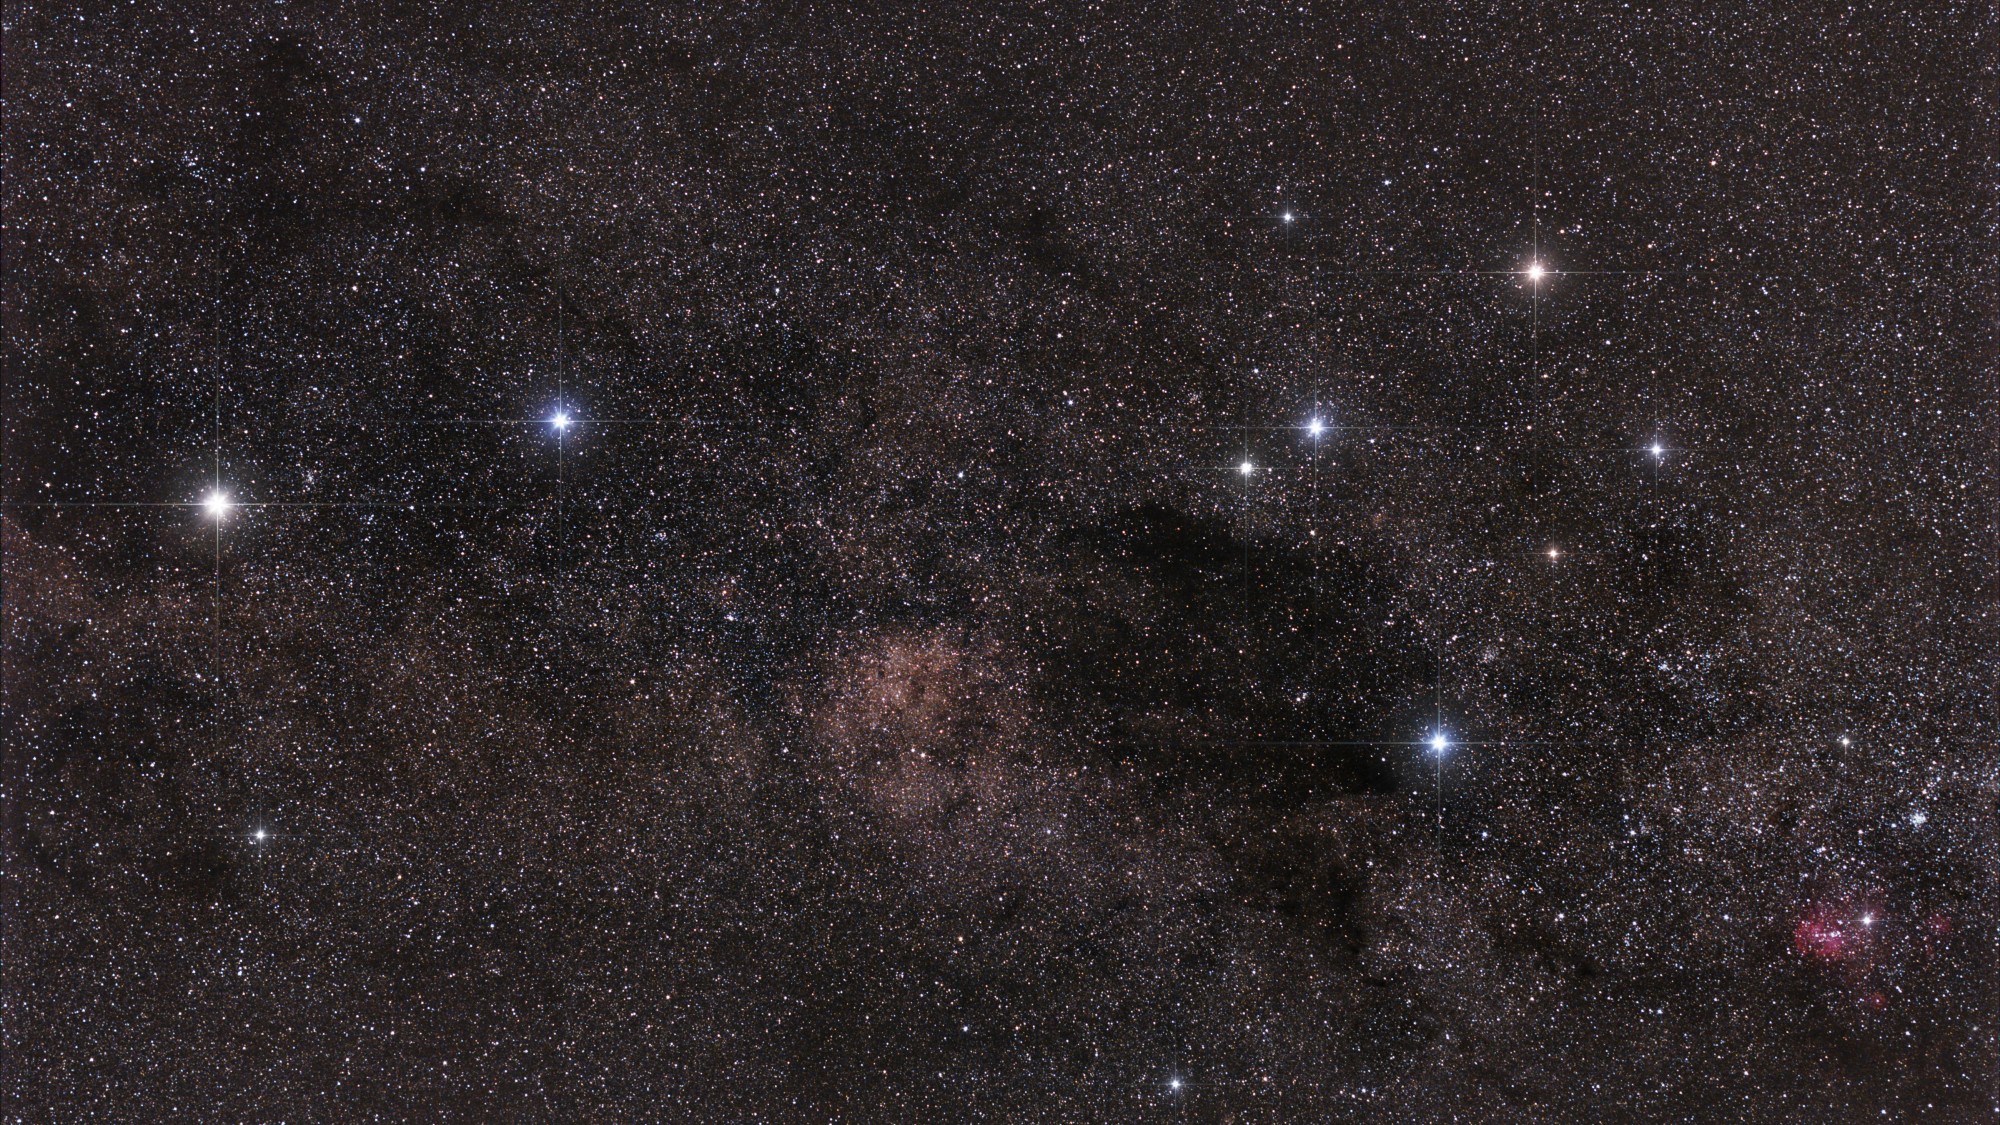
The Southern Cross or Crux (right) is the most reliable way to navigate the southern hemisphere. You can use Alpha and Beta Centauri (left), part of Centaurus, as a supplement to Crux. Photo: Brian Donovan via Shutterstock
Centaurus
The final constellation worth memorizing, Centaurus, is one of the biggest of its kind in the southern hemisphere. As you might expect, Centaurus represents the half-horse, half-man creature from Greek mythology. It doesn’t help navigate on its own, but when paired with Crux, it becomes much easier to pinpoint the South Celestial Pole.
Crux is located within the “legs” of Centaurus, directly underneath the abdomen. The two stars that make up the front leg of Centaurus (Alpha Centauri and Beta Centauri) are considered pointer stars for Crux. They help you locate south with more accuracy. So draw a line that passes directly between Alpha and Beta Centauri, traveling toward the line we already drew from Crux. The point where these two lines intersect is where the South Celestial Pole is located.
Tools
We don’t use them very often on land, but various tools have been historically relied upon for celestial / star navigation. Here are a few of them.
Sextant
The most well-known tool with a unique history for navigating the stars is the sextant; a navigational instrument used to measure the angular distance between two objects. Most often, these two objects will be 1) the horizon and 2) a celestial body of your choice.
A sextant can do this by using the Double Reflection Principle, which says that when a mirror is at angle “A,” the light is reflected off at angle “2A.” Using this principle, a sextant utilizes two mirrors that can be adjusted using the index arm on the tool.
Once you’ve located a star, like Polaris, you can adjust the mirrors until the star is superimposed over the horizon. At this point, the micrometer on the sextant will indicate the angular distance between the two objects. That reading will then allow you to get a celestial position fix, which you can use to help you find your true position.
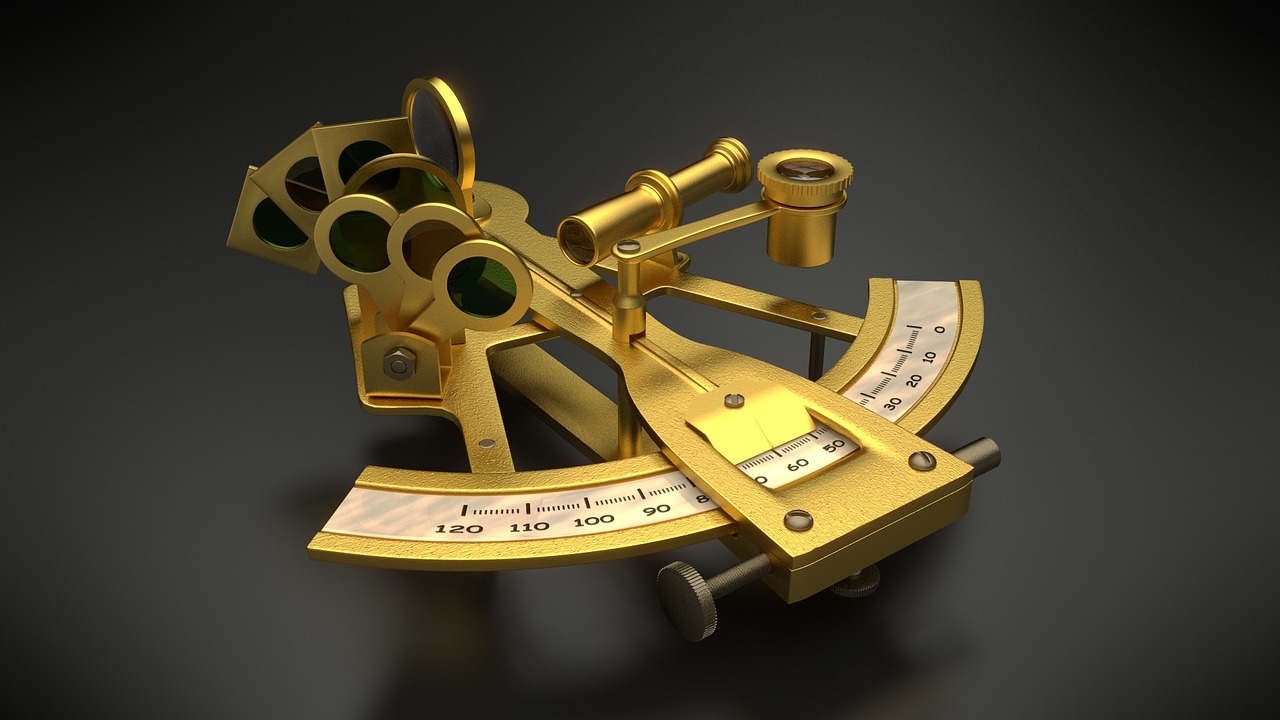
The sextant is the most well-known tool for navigation using the stars. Photo: Lars Plöger via Pixabay
Chronometer
Don’t forget that the stars are constantly moving across the night sky. Therefore, for the information gathered from your sextant to be used accurately, you need to know exactly when you took that reading.
A reliable chronometer is an invaluable tool for any celestial navigator. Since timepieces have come a long way in recent decades, a digital watch will often be good enough to meet your needs. Just make sure that it can track seconds in addition to hours and minutes.
Almanac
Knowing the position of the stars at a certain point in time won’t help unless you have something to compare it with. An Almanac (like this 2023 Nautical Almanac) is a book that gives you the position of the stars, sun, moon, and planets, with a new edition published every year.
Within the Almanac, you’ll find the daily pages, which have all the information you’ll need to navigate accurately. These pages give you the positions of celestial bodies at any given hour, every day of the year.
Along with the daily pages, you’ll receive pages for increments and corrections. These don’t change over the years, and they’re necessary for interpolating between the hourly data you’ll find on the daily pages. So, for example, the daily page might give you the data for Venus at 07:00 UTC and 08:00 UTC. But if you tracked its position at 07:16:49 UTC, you’ll need to go to the increments and corrections page to find a modification to apply.
If you’re struggling to find the constellations or using the tools for star navigation, don’t worry, there’s another method you can use to navigate – using two stakes and any bright star. Photo: Denis Belitsky via Shutterstock
How To Navigate Using Any Star
If you’re struggling to find the constellations or using the tools for star navigation, don’t worry, there’s a simple method you can use to navigate. Start by picking out any star in the night sky – I’d recommend searching for a brighter one that sits a little closer to the horizon. After that, find two sticks with a reasonably similar height and drive them into the ground about a yard away from each other. You’ll want to ensure the star is lined up at the top of both stakes.
It’ll take some time, but the star will eventually move from its position over the top of the two stakes. Since the Earth is constantly rotating from west to east, it causes the stars to move across the sky from east to west. Therefore, depending on which direction your star moved in relation to the stakes, you can determine which way you’re facing. Here’s a quick guide for your reference:
- If the star moved to the left, you’re facing north.
- If the star moved to the right, you’re facing south.
- If the star moved up, you’re facing east.
- If the star moved down, you’re facing west.
Of course, there aren’t just four directions that you could be facing. So it’s rarely as simple as watching your star move up, down, right, or left. For example, what if the star moved up and left? Based on our guidelines, that would mean you’re facing northeast. Likewise, a star moving down and right would indicate that you’re facing southwest.
Read More: Compass and Map Reading 101: Basics for the Beginner
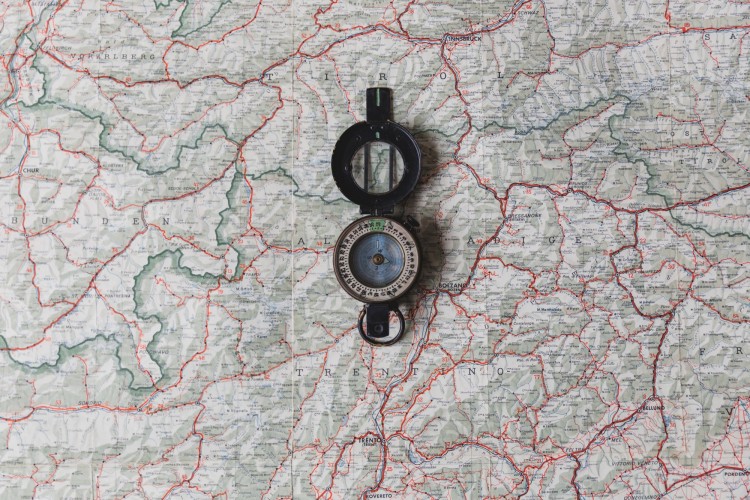
Calculate your latitude and longitude to pinpoint your location on a map. Photo: Matthew Henry via Burst
Finding Your Latitude
If you’ve ever looked at a globe or a world map, you’ve probably noticed the grid-like pattern laid on top of it. The horizontal lines mark various degrees of latitude, a distance north or south of the equator. Knowing your latitude and longitude is essential for pinpointing your location on a map.
To find your latitude in the northern hemisphere, you’ll need to locate Polaris using the star navigation methods mentioned earlier in this article. If you have a quadrant or a sextant, now would be a great time to pull it out to measure the angle between the horizon and the star. If you don’t have either of these, that’s okay too! You can approximate the angle by reaching your fist out to the horizon and stacking them until you reach Polaris. One of your fists is equivalent to about 10 degrees.
The number of degrees the star sits above the horizon will be your latitude. For example, when standing on the equator, Polaris will sit directly on the horizon, so your latitude will be 0 degrees. However, if you were at the north pole, Polaris would be directly above you, so your latitude would be 90 degrees.
Read More: Snowshoe Geocaching: Searching for Booty
Finding Your Longitude
Unfortunately, it’s never been straightforward to figure out longitude – the vertical lines of our world grid. In fact, it was nearly impossible until John Harrison created the first precise maritime clock in the 1730s. Now, you can discover longitude (relatively) easily by using an Almanac and an accurate timepiece.
First, you’ll need to know the time of solar noon at the prime meridian, located in Greenwich, England. Solar noon can be different from clock noon, so you’ll need an Almanac to give you a precise time. For example, on the day I’m writing this, solar noon in Greenwich is 11:48, which is a 12-minute difference from clock noon. If you don’t account for this difference, your calculations will be horribly inaccurate.
Once you know what solar noon is over the prime meridian, it’s time to figure out where you’re currently located. The most accurate way to do this is by tracking a shadow. You can mark down the time when the shadow was the shortest. For example, I’m located in Minneapolis, so solar noon was at 12:01.
Next, calculate the amount of time between solar noon at the prime meridian and solar noon where you’re located. For example, since I live in Central Daylight Time, I know I’m 6 hours behind Greenwich, England. Since solar noon occurred in Greenwich at 11:48 and in Minneapolis at 12:01, the sun traveled a total of 6 hours and 13 minutes between those two points in time.
Every hour, the sun travels a total of 15 longitudinal degrees. If you multiply 15 by 6.22 (6 hours and 13 minutes), you get 93.25. According to my GPS, my actual longitude is 93.26. That means my calculations were off by 0.01 degrees, equivalent to one kilometer over the Earth’s surface. Not too bad for some quick math after tracking shadows!
Have you ever used the stars for navigation? What recommendations do you have? Please share your thoughts with us in the comments below.
Read Next: 6 Ways To Refresh Your Safety for Winter Hiking and Snowshoeing


Leave a Comment