Murphy’s Law is the real deal, whether you like it or not. If something can go wrong, it will go wrong. However, the result may look different depending on what you’re doing and the time of year. Campers could experience a week of bad weather, a broken tent pole, or a bear encounter. In the worst-case scenario, they may even be victims of a mild to a severe medical emergency, far from any facility that could provide treatment.
That’s why we’re here to talk about camping first aid. With the tips below, you’ll be better equipped to respond to injury or illness while camping. In this guide, you’ll find the following:
Why You Should Know Basic First Aid
Essentials to Bring
Tips for a Few Illnesses/Injuries
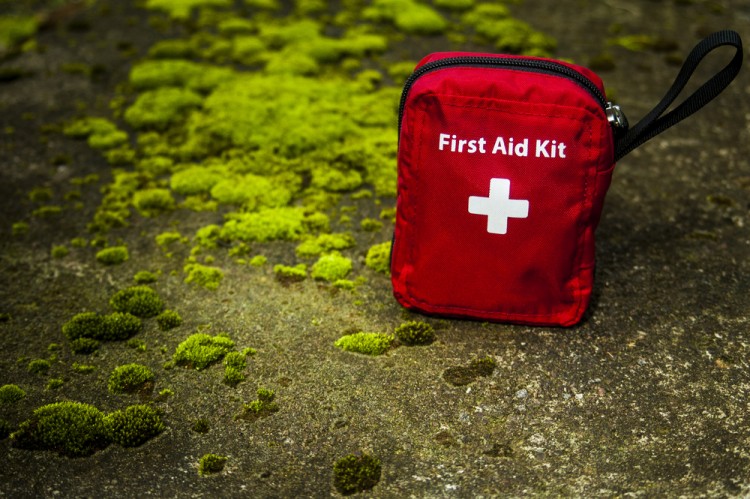
It’s imperative to have the equipment and know camping first aid tips for emergencies that may arise. Photo: Kittisak Srithorn via Shutterstock
Why You Need to Know Basic First Aid
I went through a first aid course in college because a couple of friends recommended it. They said the coursework was easy, the instructor was a lenient grader, and it would be easy to breeze through the class. So, I decided to sign up.
At the time, I had no interest in learning first aid. After all, why would I need to know it when an ambulance was only a quick 911 call away? I say “quick” because I didn’t realize how crucial those first few minutes are after a medical emergency. Many acute illnesses and injuries require immediate care. If there’s no one present to administer first aid, it’s possible they won’t make it long enough for emergency medical services (EMS) to arrive.
And that’s when you’re in the comfort of your home, at work, or walking in a well-populated area. But what happens when you experience a medical emergency on a camping trip, far from civilization? First aid may be the only treatment you get for several hours, if not days, depending on where you are in the world.
If you aren’t first aid and CPR certified, I would strongly recommend taking a course. The American Red Cross and Canadian Red Cross offer online and in-person courses. When you’re out on the trail or at a campground, that extra knowledge may just save your life or the life of someone nearby.
Read More: 6 Ways To Refresh Your Safety for Winter Hiking and Snowshoeing
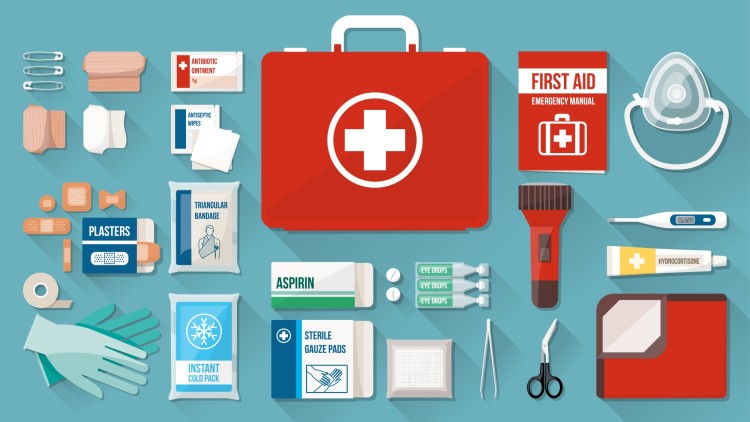
Take a first aid course to brush up on your skills and bring the essentials. Photo: elenabsl via Shutterstock
Essential Items To Bring
When you’re putting together your first aid toolkit, there are a few items you can’t do without. You can create your own kit or use a premade kit such as this one by Adventure Medical Kits.
Either way, here are the essentials that you should always bring when you head out for a camping trip:
Antiseptics
Sepsis is an extreme reaction to an infection occurring within your body. It can be life-threatening if left untreated, so it’s essential to take preventative measures to prevent it from happening in the first place.
Most often, sepsis is the result of a bacterial infection. For example, if you get a cut on your skin, it can get infected, eventually spreading into your bloodstream. In severe cases, this infection may lead to septic shock, which involves a sudden drop in blood pressure, causing organ failure and death.
Needless to say, it’s always important to keep an antiseptic inside your first aid kit. If running low, try this First Aid Kit Refill of Antiseptics, or you can use the sap from fir trees in a pinch.
Read More: Evergreen Tree Identification: Pines Aren’t the Only Evergreens
Gauze
Gauze is essential for treating deep wounds or injuries that don’t want to stop bleeding. One of its primary purposes is to soak up blood while you place pressure on the laceration. Standard bandages may become oversaturated with blood if the injury is severe, so gauze (paired with medical tape) is a much more effective treatment.
It’s worth noting that gauze should only be used for excessive bleeding. If you decide to place it on a cut with minimal bleeding, it may stick to the wound, possibly tearing off the scab as you try to remove it.
Bandages
It wouldn’t be a proper first aid kit without bandages. Make sure you have a good variety of options to choose from, whether you need to treat a small wound or something much larger.
When I say “bandage,” I’m referring to much more than the typical Band-Aids you probably have in your medicine cabinet. Gauze is a type of bandage, but there are several other types that you should also have on hand.
Butterfly bandages can be used on slightly deeper wounds that are small in width. They’re great for sealing and are much more effective than regular band-aids. You can even make your own butterfly bandages from adhesive tape.
Liquid bandages like New-Skin work well for more minor cuts. After application, it will bind to your skin, acting as a barrier against germs and dirt.
Fabric bandages are what you typically think of when you imagine a band-aid. They’re comfortable and effective, though you will need to take extra precautions if the wound is heavily bleeding. They’re also more likely to fall off when exposed to water.
Plastic bandages aren’t as comfortable or practical as fabric bandages, but they are waterproof. So this bandage is helpful if you expect to be exposed to high volumes of water.
Elastic bandages like those by Ace are what you will use on orthopedic injuries, like muscle sprains and bruises. They work to restrict the flow of blood, reducing both pain and swelling.
Read More: Gear Review: Adventure Medical Kits for Ultralight and Watertight First Aid
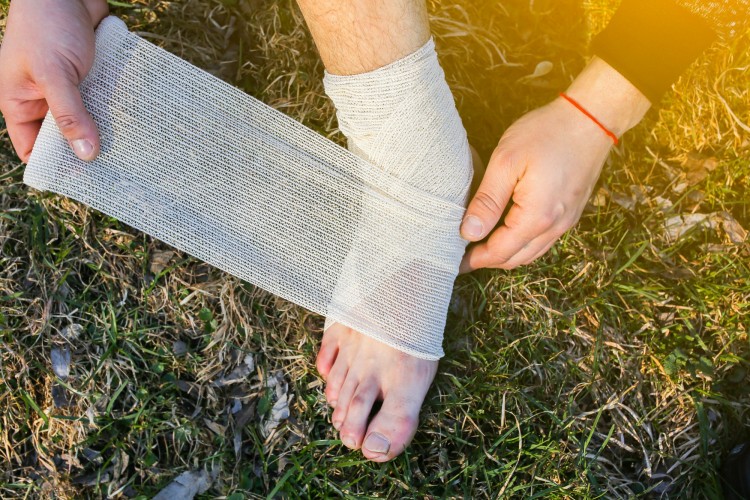
You can use elastic bandages when wrapping sprains and bruises. When wrapping the ankle, be sure it’s not too tight, but your ankle feels supported. Photo: Only_NewPhoto via Shutterstock
Medical Tape
Primarily used in a supporting role, medical tape ensures all your other first aid supplies stay where they need to be. For example, it’s an effective way to secure gauze over a bleeding wound or help a larger bandage remain in one place.
Hopefully, you’ll never break a bone on a camping trip, but if you do, you can also use medical tape to create a makeshift splint. You’ll need something rigid to act as a brace (like a branch, a plank, or even a Pringles can), which you’ll then secure to the injured area using tape. It’s not professional work, but it will hold you over until you can get to a hospital.
If looking for medical tape for sensitive skin, Hypafix might be one alternative.
Surgical Gloves
If your camping partner is the one who got hurt, you don’t want to be handling their blood (and possibly other fluids) without proper protection. And frankly, you probably don’t want to manage your wounds without wearing surgical gloves, just in case you haven’t had a chance to disinfect your hands sufficiently.
Nitrile and latex are your two glove options, but I’d suggest going with nitrile when you can. It’s more robust and has better chemical resistance than latex gloves. And best of all, you won’t experience an allergic reaction when using them – a significant bonus if you break out in a rash when you come in contact with latex.
Tweezers
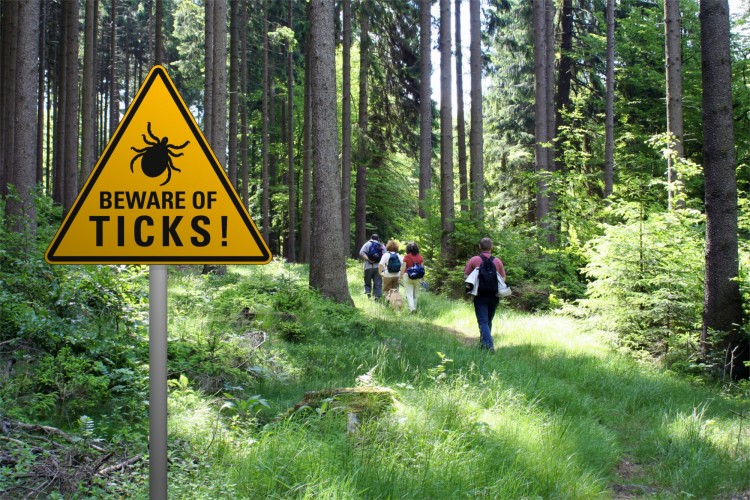
One of the most underrated additions to any camping first aid kit, tweezers are something you can’t do without. Useful for removing splinters and ticks, you can also use them to get rid of dirt and debris that might have found their way into your wound. Thus, it’s a great way to clean a cut so that it doesn’t trap any foreign objects under your skin as it heals up.
Read More: Ticked Off: Protect Yourself from Lyme Disease
Moleskin
Blisters are inevitable when you’re hiking or backpacking long distances. You’re especially likely to find them on your feet due to the skin rubbing back and forth against your hiking boots.
In a perfect world, you’d be able to stop and rest the moment you notice a blister forming. But often, you have no choice but to carry on, putting additional stress on the area.
To prevent the blister from becoming infected and reduce the amount of pain you feel in the area, place a moleskin patch on the wound. Moleskin, like in this Blister Medic Kit, is essentially a large piece of woven cotton with adhesive on one side – the part that’s supposed to go on your skin. It acts as a barrier, reducing the friction directed toward your blister and preventing it from worsening.
As an alternative to moleskin, you can also use KT Tape.
Read More: Gear Review: KT Tape for Snowshoers
Scissors
But to use moleskin and many other bandages while administering camping first aid, you need scissors to cut them to the appropriate size. If you don’t have a blunt-tip pair of scissors or don’t feel like carrying them with you, a knife or a multi-tool would also be sufficient for these tasks.
Read More: The Multi-Tool: Never Go Snowshoeing Without It
Needle and Thread
Hopefully, it never happens to you, but there may come a time when you need to close up a wound using a needle and thread. It’s a makeshift way of giving yourself (or someone else) stitches for injuries that won’t stop bleeding or have jagged edges.
Before attempting this, ensure the wound and the needle are properly sterilized.
Splints
A friend of mine loves to hunt and will often go on solo backpacking trips through Colorado in search of elk. One fateful day, he slipped and fell into a ravine, breaking his arm and tearing several ligaments in his shoulder. It wasn’t pretty, but it could have been a lot worse if he wasn’t resourceful enough to create a splint to prevent further injury.
My friend used a branch and his shoelaces to make it work, but you can be more prepared than he was in case you find yourself in a similar situation. There are various options available for campers, but the SAM splint has to be one of the best.
Read More: Survival Tips for Snowshoeing Enthusiasts
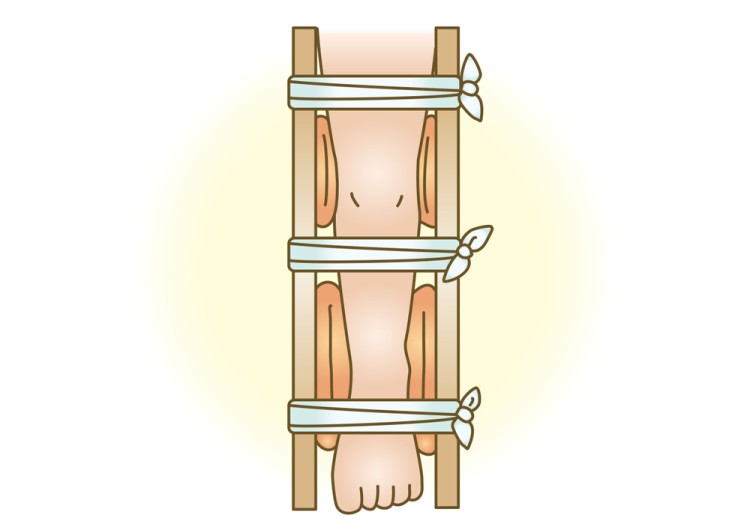
Splints are a helpful way to treat broken bones or injuries that need to be held in place. Photo: IROHA – Brush Art via Shutterstock
Medications
Antihistamines are for allergies. If you suffer from seasonal allergies, you won’t have much luck escaping from tree, grass, or weed pollen while camping during warmer weather. Antihistamines will make your trip a lot more enjoyable.
Anti-diarrheal medications are needed in case something you ate or drank didn’t sit well with you. Diarrhea can cause excessive fluids to leave your body, bringing about dehydration if you aren’t drinking enough water.
Anti-inflammatory medications can help relieve pain and reduce redness and swelling, making them an excellent option for both injuries and fever.
Pain medication can be helpful for injuries. Most injuries you sustain will be painful, and medicine will either get you through the trip or until you can reach a medical facility.
Aspirin is for heart conditions. It’s particularly helpful if you believe you’re experiencing a heart attack.
An epi-pen is for severe allergic reactions. If you’ve ever had anaphylaxis, chances are you carry one with you anyway.
Antacids are for stomach discomfort, nausea, and acid reflux.
You can find most of these medications, and other first aid items, in kits such as this one by Adventure Medical Kits.
Read More: Gear Review: Adventure Medical Kits for Ultralight and Watertight First Aid
Other Tools
The items listed above are the essentials, but there are a few other things that should find their way into your first aid kit. These include:
• Thermometer
• Heat reflective blanket
• CPR mask
• Hand sanitizer
• Cotton swabs
• Biodegradable soap
• Safety razor with a blade
And, of course, you’ll need a container to put everything.
Read More: Winter Camping Checklist: What To Bring on Your Trip
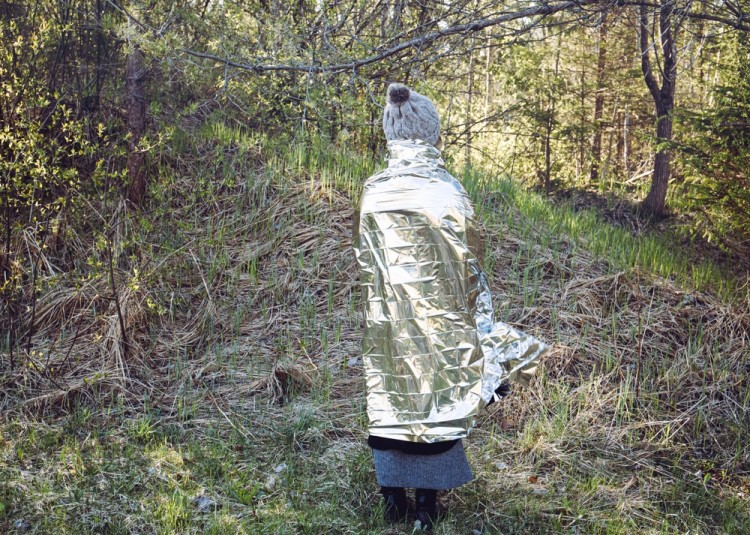
A heat reflective blanket and your first aid kit are vital for cold temperature emergencies. Photo: FotoHelin via Shutterstock
Tips for Injuries and Illnesses
In addition to having your first aid kit, it’s also crucial to know how to treat a few injuries or illnesses you could encounter on the trail or while at your campsite. We cover bug bites, poisonous plants, and indicators for life-threatening emergencies as a starting point for first aid. In cold weather, there are a few other snowshoeing hazards to be aware of as well.
Treating Bug Bites and Stings
Bug bites and stings are pretty much inevitable any time you spend a few days in nature. Most of the time, they’re relatively harmless, but you should still take them seriously if you experience discomfort or an allergic reaction.
For mild bites and stings, try to move areas with fewer insects, like the inside of your tent. If there’s a stinger still in your skin, remove it using a pair of tweezers, and wash the area using soap and water. Then, place a cold washcloth or rag over the area to help reduce any pain and swelling. At this point, you may consider taking an antihistamine to help with the itch.
If you experience a severe allergic reaction to the bite or sting, it may be time to call 911 or head to a nearby hospital. Keep an eye out for symptoms like trouble breathing, hives, dizziness, and swelling in the lips, eyelids, face, or throat, as these may be signs that you have an anaphylactic reaction.
Read More: How To Protect Against Mosquitoes: Tips for Staying Safe
Know Your Poisonous Plants
Walking through nature will expose you to various harmful plants, so it’s good to know what can be found in the specific biome you find yourself in so you’ll know how to administer first aid while camping. Some of the most common are:
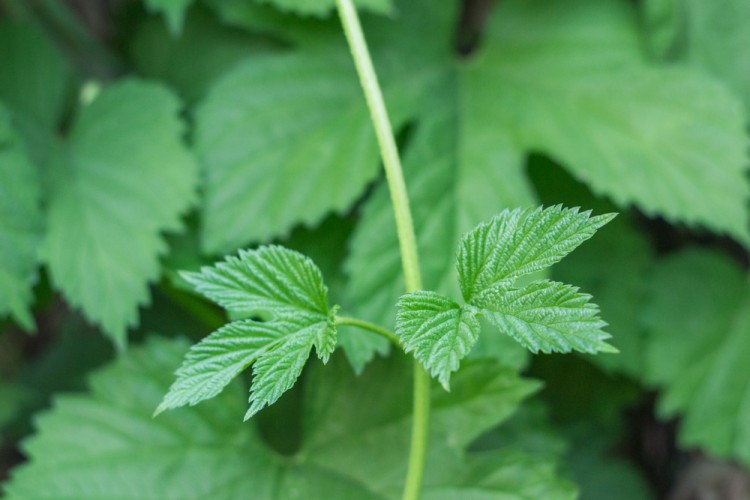
Poison Ivy: A small plant that grows up to 30 inches tall. Most commonly recognized by its glossy, three-pointed clusters of leaves.
Poison Oak: A leafy shrub that can grow up to 6 feet tall. It tends to look like a climbing vine, growing in shady areas. Look out for rounded leaves with white, green, or yellow flowers.
Poison Sumac: This plant grows as a small tree or woody shrub, so it’s pretty easy to spot this one. You can usually find them growing in marshy or wooded locations.
If you come into contact with one of these, removing the urushiol (plant oil that causes the rash) as soon as possible is important. Wash the area thoroughly and immediately, using dishwashing soap or rubbing alcohol. After that, rinse your skin with cool water and clean underneath your nails. This process will help remove any remaining oil that could cause a rash later.
Read More: The Foraged Feast: Edible Wild Plants
Protect Yourself from UV Rays
I spent two years working in a dermatology office when I was fresh out of college. I witnessed enough biopsies, incisions, and surgeries to last a lifetime and gleaned one crucial tip from what I saw – take care of your skin!
In particular, skin damage caused by exposure to UV radiation will increase your chances of developing skin cancer later in life. So pack plenty of sunscreen (try this one by Sawyer) for your camping trip no matter the time of year, and don’t forget to wear a hat that protects your face and neck. Ideally, you’d also wear long sleeves and pants, but I understand that it can get hot quickly in the warmer months.
Just try to limit your sun exposure to a few minutes here and there, staying in the shade as much as possible to keep yourself from getting burned.
Read More: Must-Have Winter Skin Care Tips for Snowshoers
Life-Threatening Medical Emergencies
It’s not a possibility any of us want to think about, but life-threatening emergencies don’t go on vacation just because you do. While relatively uncommon, heart attacks and strokes have happened to many people hiking or during the night in their tent. And it’s not just elderly folks who are at risk.
Whether you’re 20 years old or 80 years old, it’s essential to know the signs of heart attack and stroke. That way, you can recognize them in yourself or someone else and respond appropriately to the emergency.
Heart Attack
Heart attack symptoms tend to vary from person to person, but some of the most common include:
• Chest pain/discomfort
• Upper body pain
• Stomach pain
• Shortness of breath
• Nausea
• Anxiety
• Lightheadedness
• Sweating
• Feelings of dread
If you or someone else is experiencing a heart attack, the best thing you can do is call 911 or rush to the nearest hospital. Never drive yourself to the hospital unless it’s your only option.
While waiting for emergency medical services to arrive, try to relax as best as possible and loosen any tight-fitting clothes. Take aspirin if you aren’t allergic to it or nitroglycerin if it’s been prescribed by your doctor.
Stroke
When blood flow to your brain becomes disrupted, you’re at risk of experiencing a stroke. Common symptoms include:
• Numbness, especially in the face
• Slurred speech
• One arm is weaker than the other
• Blurred vision, especially in one eye
• Headache
• Dizziness
• Loss of balance
• Loss of bladder or bowel control
Time is of the essence when it comes to strokes. If you experience any of the symptoms listed above, it’s time to call 911 immediately.
There isn’t much first aid you can administer for a stroke while camping, but it’s important to understand that this condition does make falling more likely. If you think you might be experiencing a stroke, lay on the ground, ideally on your side. That way, if you begin to vomit, you won’t suffocate in the process.
When taking care of someone else having a stroke, follow the steps above and reassuringly talk to them. Cover them with a blanket to keep them warm, and don’t give them anything to eat or drink. Monitor their condition closely until EMS arrives, and if it looks like they aren’t breathing, start performing CPR.
Read More: Book Review: Hypothermia, Frostbite, and Other Cold Injuries
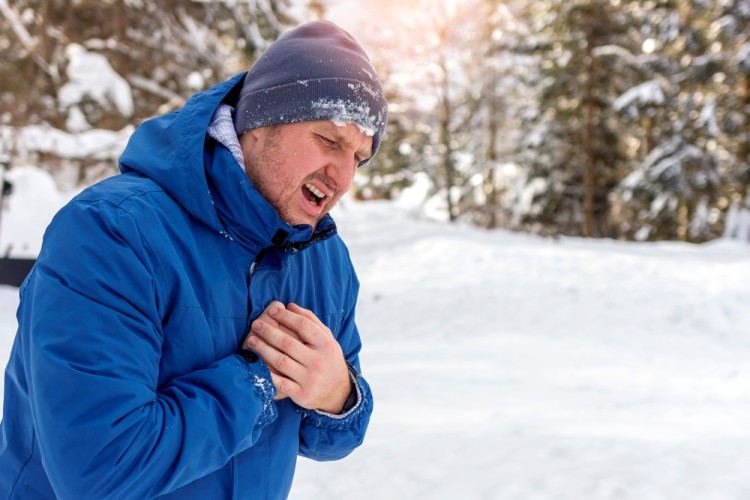
If someone is experiencing a heart attack or stroke, call 911 immediately. Photo: Jelena Stanojkovic via Shutterstock
Final Thoughts
As the famous quote goes, “prevention is the best medicine.” However, accidents and unexpected health conditions do happen, which is why it’s so important to be prepared for them.
In addition to bringing your first aid kit, create a plan you’ll follow if disaster strikes. For example, do you know where the nearest medical facility is? Have you informed the other camping group members of any health problems? Are you the only one qualified to perform first aid in an emergency?
Consider the answers to these questions and delegate roles accordingly. Overall, entering into an emergency with a plan will save you the time needed to come up with one at the moment. And those precious seconds may make all the difference.
What items do you keep in your camping first aid kit? What other tips do you have for first aid? Please share your thoughts with us in the comments below.
Read Next: 7 Steps to Being a Survivor: How To Survive Outdoor Emergencies

In 50+ yrs’ occasional backpacking, I’ve been peripherally involved w/broken ankle. I also encountered a person with a suspected broken back and a person who drowned. ‘Though it’s not a “bad idea,” I’ve never carried or used a first aid kit, other than a few aspirin tablets and Band-Aids.
I enjoy it