
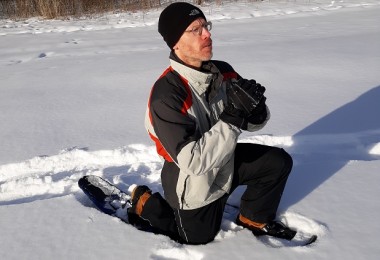
Nothing is better than going on a long hike through the snow on a crisp winter day. Revisiting a favorite destination or blazing a new trail never gets old. But there’s one thing that does, and that’s wrist and ankle pain. It always seems to pop up at the worst time. Fortunately, there’s something you can do about it. With a few quick exercises, you can be well on your way to improving your strength and mobility while decreasing the pain in your wrists and ankles that’s become all too familiar when going on a snowshoeing adventure.
Here are a few warm-up exercises you can do at home or on the trail before your next trip:
Stretching can vastly improve your ankle and wrist mobility. Photo: Scott Hotaling
Make a Fist
This exercise helps warm up your hand, wrist, and forearm. It’s also a natural and simple exercise to do. So no matter your age and ability, it’s the perfect movement to start with.
- Extend your fingers out and away from each other.
- Slowly bring your fingers together and make a fist.
- Repeat the movement several times.
This movement can be used as a warm-up or as part of your general exercise routine. After you’re warmed up, try speeding up the exercise and going as fast as you can. You’ll be surprised how fast you feel the burn!
Extend your fingers as far as you can before making a fist. Photo: Scott Hotaling
Make a fist to improve your wrist mobility. You can speed up the exercise for more challenge. Photo: Scott Hotaling
Wrist and Ankle Circles
This is another great warm-up and exercise to improve your ankle and wrist mobility. The goal here is all about using and increasing your full range of motion.
- Begin by relaxing your hand with your palm down.
- Slowly trace a circle with your wrist. Draw as big of a circle as you can comfortably without causing pain.
- Trace in both directions, counter-clockwise and clockwise (left and right).
- Repeat the same process with your ankle.
This exercise should be done slowly and controlled. Speed is not important here. What is important is to use your full range of motion during the movement. This can really help loosen up your wrists and ankles and increase your mobility after just a few repetitions.
Wrist Curls and Extensions
These exercises can be performed with very little weight to be effective.
- Place your arm on your leg or arm of a chair for support.
- Turn your hand palm up and curl your wrist up. Your arm should not move during the exercise.
- Perform several repetitions.
- Repeat the exercise with your palm facing down and extend your wrist up.
You can add weight by holding a light dumbbell or, my personal favorite, a plastic bag packed with fresh snow! If you don’t have access to either one, grab a water bottle or can of your favorite soup to add just the right amount of resistance.
Avoid the tendency to lift with your arm, especially when using a heavier weight. Focus on form, not how much weight you can lift.
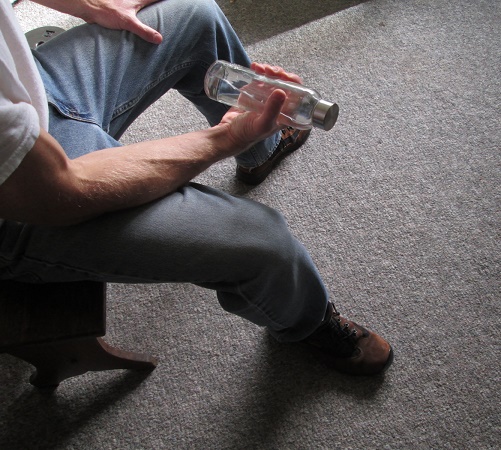
You can use a water bottle or similar household object to add more weight to your wrist curls. Photo: Scott Hotaling
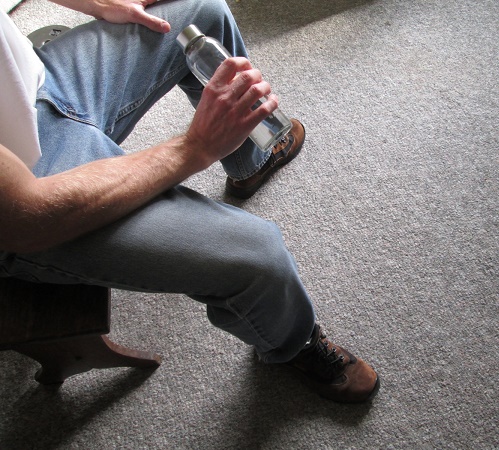
Complete a wrist extension by keeping your palm face down and extending your wrist up. Photo: Scott Hotaling
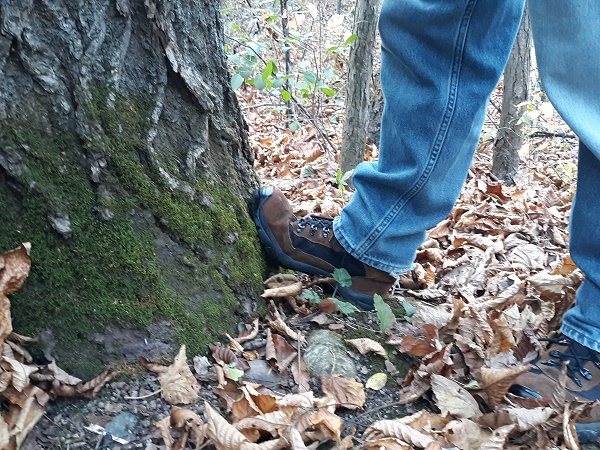
Wall Wrist and Ankle Stretch
This is a great stretch to improve your ankle and wrist mobility that can be performed with a wall’s help, and who doesn’t have one of those nearby? Your favorite hiking trail, you say? No worries, use an old (not old, wise) tree with a large trunk. It’ll give you all the support you need.
To stretch your ankles:
- Stand in front of a wall (or tree) with one foot in front of the other.
- Place your feet about a foot’s distance apart.
- Lean slightly forward and place your hands on the wall at about chest height for support.
- Keep your back knee straight and bend your front knee slightly.
- Imagine digging in your back heel while you bend forward.
- Keep your front heel on the ground.
- Hold the stretch for 20-30 seconds.
- Repeat with the opposite leg.
To stretch your wrists:
- Keep your palms flat against the wall.
- Lower your hands down the wall slowly until you feel a nice stretch.
- Hold for 20-30 seconds.
Avoid overstretching. You should not feel any pain when performing this or any other exercise.
As you begin the movement, start slowly until you begin feeling a stretch in your calf and/or wrist. Avoid any bouncing or jerky movements when stretching. The stretch should feel good and comfortable, not painful, or difficult to hold in any way. Hold for at least 20 seconds, and enjoy the stretch.
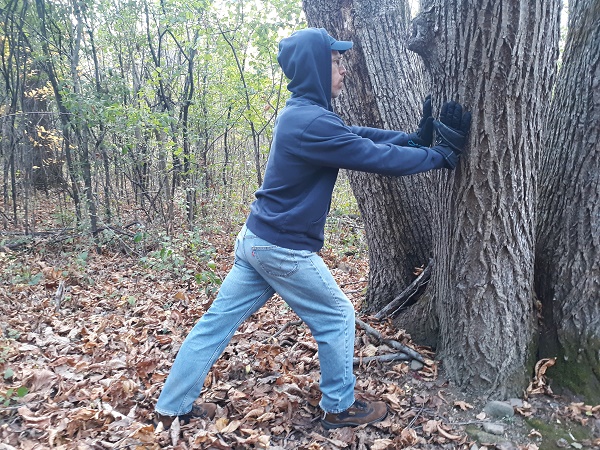
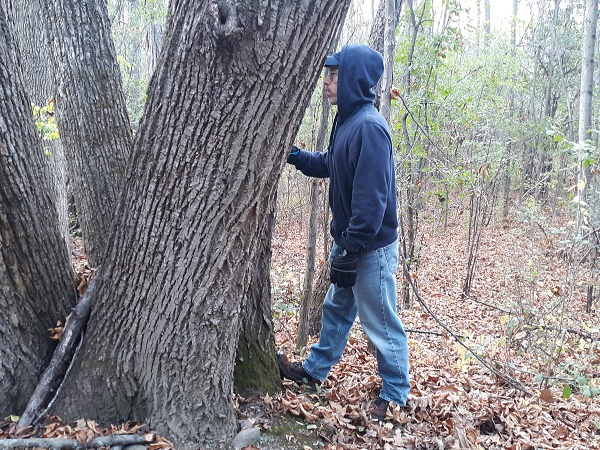
You can perform your ankle and wrist stretches outside on a tree. Photo: Scott Hotaling
Wrist Climbers
You can increase the speed at which you do this exercise to really ramp up your workout. You can use a dumbbell, water bottle, or similar cylindrical (tube) shaped object. A baseball bat works great too. If you’re the adventurous type, look for the perfect branch to use on your next hike!
- Hold the object of your choice with both hands at each end.
- Rotate the object by extending one wrist back and letting the object slide through your opposite hand.
- Repeat using the opposite wrist.
- Continue rotating the object between your hands for 30 seconds.
- Rotate it in the opposite direction by flexing your wrists downwards.
- Attach a light, small weight with a string to the object for an increased challenge and improve the visual effect.
Avoid swinging movements with your arms during the exercise. Always keep them in a fixed, stable position, either held out in front of you or supported on your legs or another solid surface.

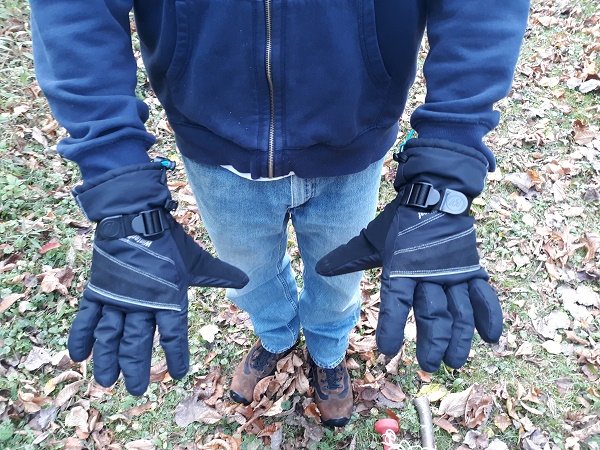
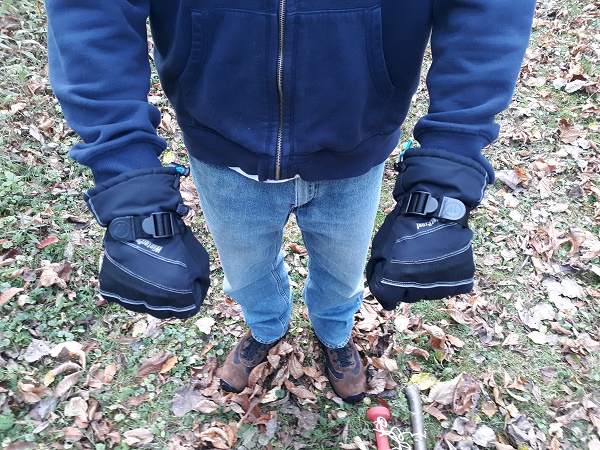
Rotate your object of choice by extending one wrist back and allowing the object to slide through the other hand. Photo: Scott Hotaling
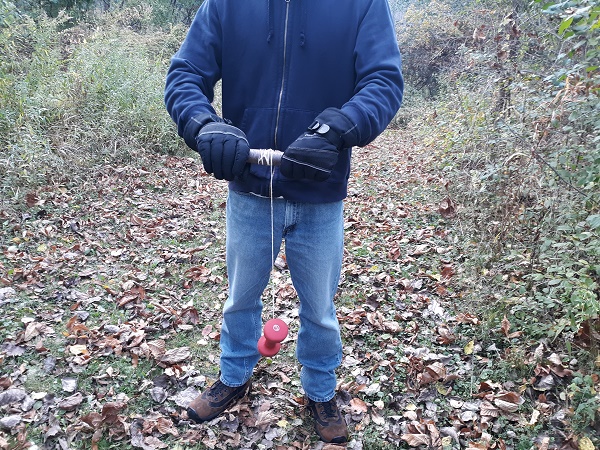
Use a dumbbell to add weight to your wrist climber. Photo: Scott Hotaling
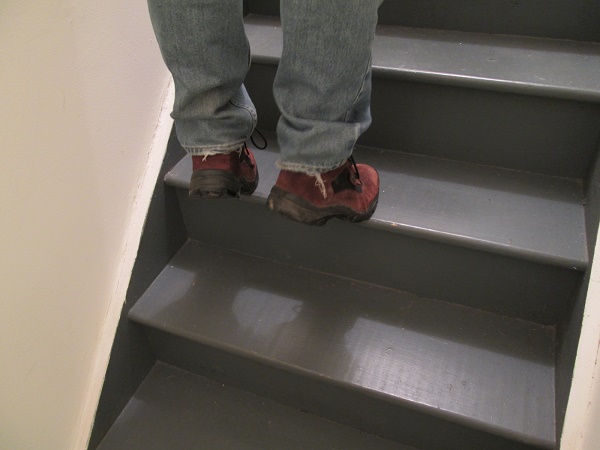
Heel Drop Stair and Wall Stretch
The heel drop stretch is more aggressive than the ankle/calf stretch. If you struggle with your balance or lack significant mobility in your ankle, the heel drop wall stretch is a modified version of the heel drop stair stretch.
To complete the heel drop stair stretch:
- Stand up straight on the step of a staircase.
- Step back slightly with one foot, so just the front half is supported, and your heel is behind/off the step.
- Allow your heel to drop, supporting yourself with your opposite leg and arms by holding on to a railing or a wall.
- Hold the stretch for 20-30 seconds.
- If you have sufficient flexibility and balance, you can drop both heels off the step simultaneously. This will look and feel similar to standing backward on a diving board. Again, use a railing or wall for support.
- Discontinue the exercise if you struggle to maintain your balance or feel any pain.
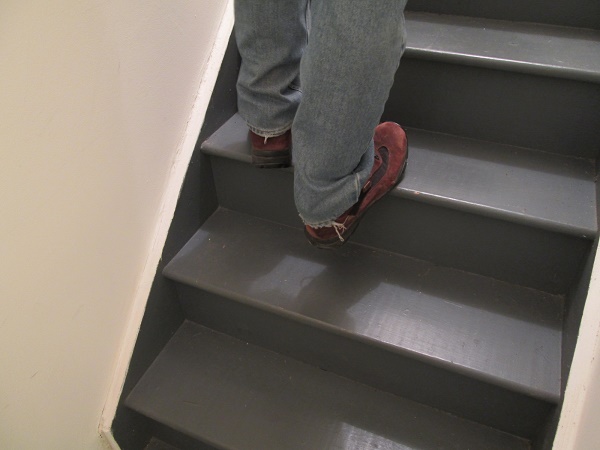
Use the heel drop stair stretch exercise to stretch your calves and ankles. Photo: Scott Hotaling
If the heel drop stair stretch is a bit too aggressive or if you don’t feel comfortable doing this exercise, try the heel drop wall stretch. The wall stretch is an excellent variation for those who don’t enjoy or feel comfortable using stairs to stretch and/or lack the flexibility and balance that the previous heel drop stretch requires.
Read More: Exercises To Improve Balance: One Foot At A Time
To complete the heel drop wall stretch:
- Stand up straight in front of a wall with one foot in front of the other, about a foot’s distance apart.
- Place the front half of your front foot against the wall as if stepping on it. Your toes should be higher than your heel, and your foot should be at an angle to the floor.
- Keep your heel on the ground.
- Lean your body forward and keep your front leg straight.
- If you still have difficulty with your balance, place your hands against the wall to help you.
- Repeat with the opposite leg.
You can perform both the heel drop stair stretch and heel drop wall stretch if you’d like to. One is not better or worse than the other, just a different way of accomplishing the same goal. Try to hold the stretch for at least 20-30 seconds.
The heel drop wall stretch (which can be completed with a tree) is a modified version of the heel drop stair stretch. Photo: Scott Hotaling
Read More: Don’t Forget To Stretch For Snowshoeing!
Calf Raises
You can improve your ankle and wrist mobility with calf raises, which can be done on the stairs or the floor. The benefit of using stairs for this exercise is that you can use your full range of motion with each repetition. Calf raises can be done from a seated or standing position. Your starting position dictates the muscle the exercise targets. I’d recommend performing the exercise both ways if possible.
- Stand up with your legs straight.
- If starting from a seated position, use a chair that allows you to bend your knees at about a 90-degree angle with your feet flat on the floor.
- Press the balls of your feet into the floor, raise your heels off the ground and stand on your toes.
- Pause and lower your heels to the floor. Go slowly and avoid dropping. Going down is just as important as going up.
You can also do this exercise using one foot at a time. When standing, this will significantly increase the challenge of the exercise. Remember to maintain good posture. Keep your back straight, not rounded, throughout the movement.
Seated calf raises help isolate and target the soleus muscle, which lies deep/under the more superficial gastrocnemius. It’s the gastrocnemius muscle that we “see” and is most commonly thought of as the calf muscle. Both of these muscles work in combination to help you “flex” your calf and stand on your toes.
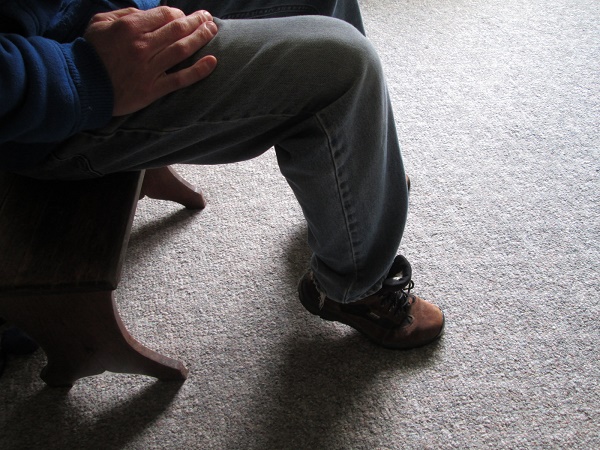
If seated for your calf raises, remember to maintain your posture and keep your back straight. You can perform this exercise one foot at a time. Photo: Scott Hotaling
To increase the challenge:
Standing calf raises will be more difficult due to the fact you’re lifting your entire bodyweight. Stand next to a wall or chair and use them for support if you struggle to keep your balance. If you feel comfortable, try using the stairs or a stable, weighted step. In general, using your muscle’s full range of motion is preferred.
Weight can be added for an increased challenge. It can be anything from a pair of dumbbells to a bag of flour or other common household items. Just choose one that’s comfortable to hold or easy to put into a backpack. Strap on the pack or hold the weight in each hand for standing calf raises; lose the pack and place the weight just behind your knees when seated.
By using the stairs for your calf raises, you use your full range of motion. Photo: Scott Hotaling
The most important part of any exercise program is consistency. Keep at it and keep learning. Now let’s play in the snow!
What stretches and exercises do you do before snowshoeing? Do you have any other recommendations to improve your ankle and wrist mobility? Please share them with us in the comments below!
Read Next:
Chiropractor Approved Injury Prevention Tips For Snowshoers
How To Prevent Ankle Pain Before Snowshoeing
Back To Basics: Back Exercises For Snowshoers
Knee Problems & Pain When Snowshoeing


Leave a Comment