All sorts of people, adventurers and outdoors people, use photography to tell a story and to capture extra special moments in time. Photographs are socially and commercially influential. My husband Darrel and I also use photography for artistic expression. In recent years photography has become a valid art form, and our home is decorated with images of our travels and the wonderful things we’ve seen.
We’re an active couple, hiking and biking, sandshoeing, and snowshoeing, and we love to keep our personal photo journal on a digital photo frame. It’s so great to relax with our slideshow of memories, where we can reflect upon and “relive the moment”; the joy and excitement of that first encounter with a moose, or the relief of reaching the summit of Wheeler Peak, remembering how astonished we were by the view. So let’s get out there on the trail with our cameras!
Here are a few tips for those looking to break into photography and capture some beautiful images.
You can use photography to reflect upon and “relive the moment,” like this outing at St. Mary’s Glacier in Idaho Springs, Colorado. Photo: Darrel Heller
Some of the links in this article may contain affiliate links. When you purchase using these links, part of the proceeds go to Snowshoe Mag. Additionally, as an Amazon Associate, we earn from qualifying purchases. Please see our disclosure for more details.
First Things First
Dress and gear up for your specific outing.
It’s so important to be as comfortable as possible while photographing in the field because you won’t want anything to get between you and that great shot. Proper seasonal weather wear is essential, as is the right gear for your activity.
While snowshoeing, we always keep disposable (or recyclable) hand warmers (like these) in our gloves because we operate our cameras “naked-handed,” and these will warm our fingers up fast.
Read More: Covering the Extremities: Prepare for the Snowshoeing Season
Take the images you want by choosing a digital SLR camera with a focal length between 18mm-300mm. Photo: Darrel Heller
Choosing a Camera and Accessories
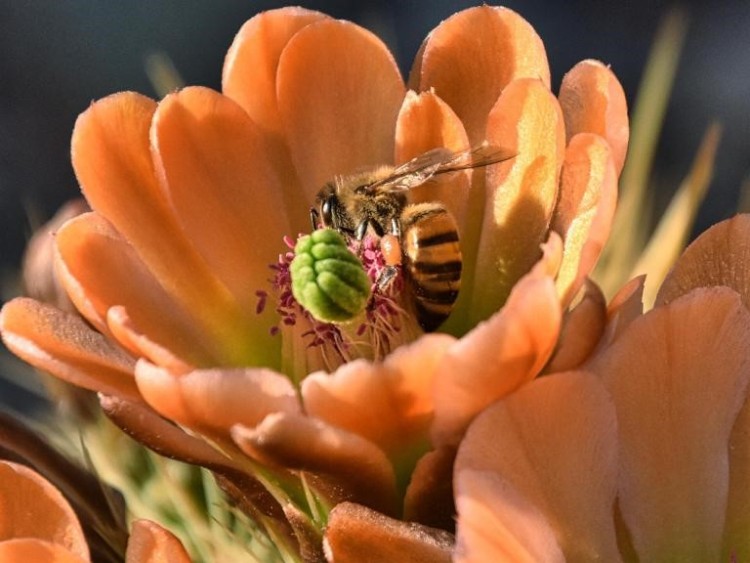
You’ll need a good digital SLR camera with a lens capacity of focal length between 18mm-300mm. A longer focal length might be even better.
This gear is essential because you’ll want to be able to get versatile photos without too much fuss and, ideally without changing your lens. For example, you may want a view of the entire landscape or the mountain you’re approaching or zoom in on that pretty flower.
Darrel uses a Tamron 18mm-400mm lens on his Nikon D500 or Nikon D3400. Dial your lens up or down to suit your purpose. Basically, the shorter your focal length, ie:18mm, the wider the image. Think landscape shots.
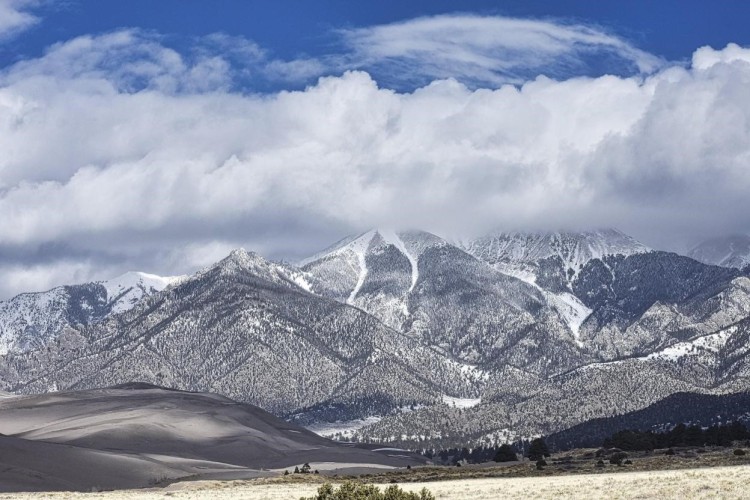
The shorter your focal length, ie:18mm, the wider the image. This format works for landscape shots, such as this photo at Great Sand Dunes National Park, Colorado. Photo: Darrel Heller
Or dial it up for that great wildlife image. You’ll likely get your perfect sport/activity shot somewhere in between.
It’s important to be “hands-free” for your camera. Choose a chest harness (like this one) for quick and easy access and a space to tuck your lens cap and a few other accessories. In the field, it’s also good to protect your camera with a silicone cover. Even though it’s not waterproof because our cameras’ dials and buttons are necessarily exposed, a camera cover does offer some protection against minimal impact or scratches and definitely improves grip without interfering with your shot.
Don’t forget to bring extra batteries; store them in an inside jacket pocket to keep them warm while snowshoeing or other winter activities.
Read More: What To Bring When Snowshoeing: Top Accessories for the Day Hiker
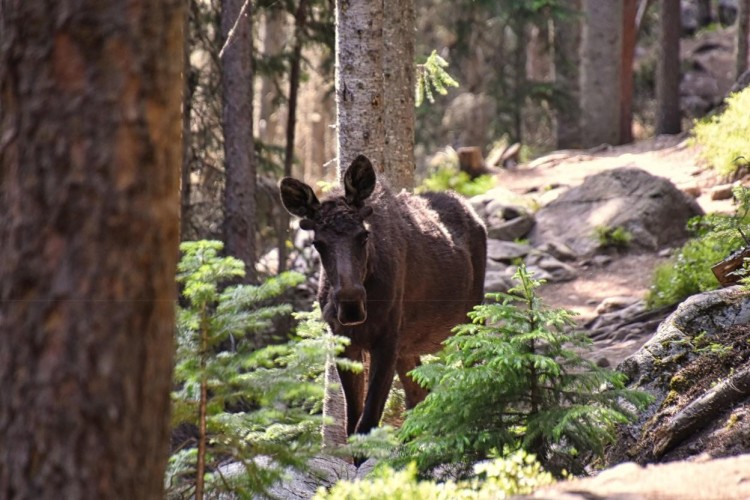
You can dial your lens up with a longer focal lens for wildlife photos (like this moose on Monarch Lake Trail in Granby, Colorado). Photo: Darrel Heller
Basic Camera Settings
One tip for outdoor photos is to become familiar with how your camera settings will affect them. Below are a few settings and definitions to be aware of on your camera.
Aperture
Aperture controls the amount of light that will pass through your lens, referred to by “F stops.” The lower the F-number, the larger the aperture opening, and the smaller the area of an image in sharp focus.
Also, most cameras have an “aperture priority mode,” which will allow you to set a specific aperture while your camera selects the coordinating settings for proper exposure. This option is probably the best mode for much of your outdoor photography and most of your action shots. In this mode, you can control what part of your image is in the sharpest focus while still capturing your background.
Many professional sports photographers use Aperture Priority Mode and advise that the most common mistake made by amateur photographers is to use full Manual mode.
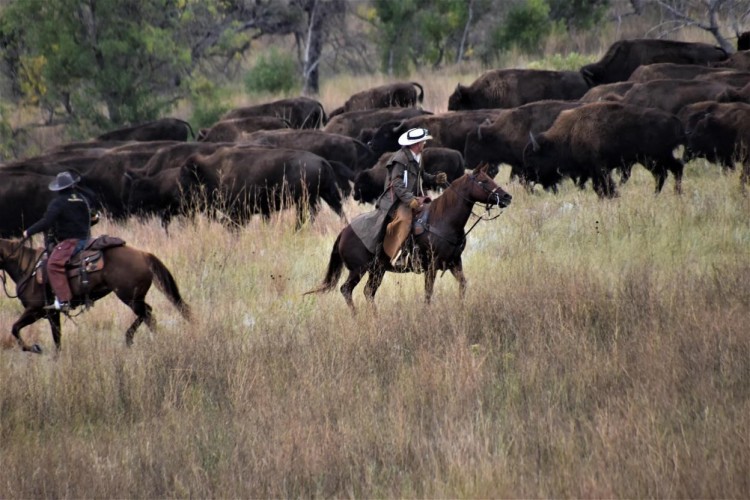
In aperture priority mode, you can control what part of your image is in the sharpest focus while still capturing your background. For example, look at this shot of a buffalo roundup in Custer State Park, Custer, South Dakota. Photo: Darell Heller
Shutter speed
Shutter speed controls the length of time that your camera’s shutter “stays open,” i.e., the length of time that light hits the sensor of your camera. This is usually expressed in fractions of a second.
For instance, a very fast shutter speed will freeze your bird in flight, while a relatively slow shutter speed will convey the movement/flight of your subject in a blur or out-of-focus portion of your photograph. Most cameras have a “shutter priority mode,” which will allow your camera to choose the appropriate aperture for your best shot.
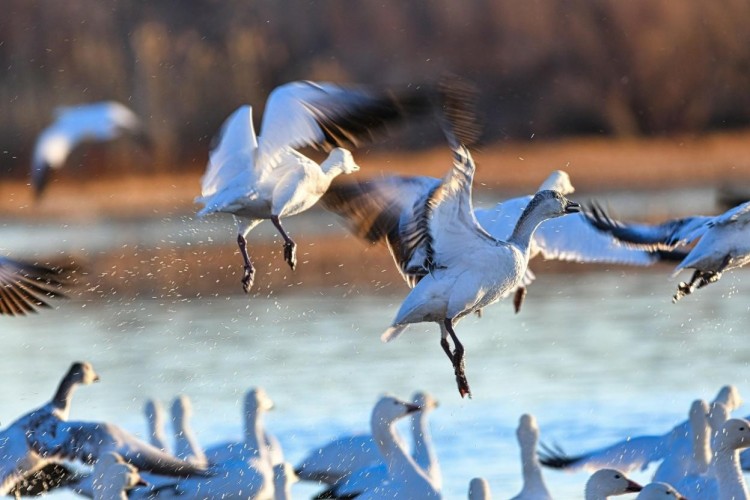
A relatively slow shutter speed will convey the movement/flight of your subject in a blur, or out-of-focus portion of your photograph, like these snow geese at Bosque del Apache, Socorro, New Mexico. Photo: Darrel Heller
ISO
ISO basically refers to the level of bright and dark in your photo. Increased ISO numbers will result in more brightness. Think high ISO for low light or night photography. Lower ISO is generally used for taking pictures on a sunny day while snowshoeing because all that bright white will likely need adjustment.
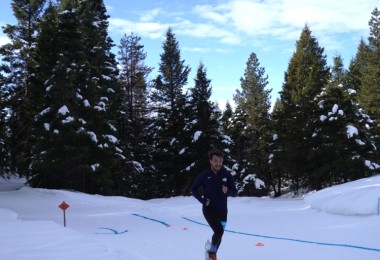
Also, think of contrast on a large field of white. Try to include shadows on the snow or dark or brightly colored gear or clothing.
This may sound a bit more complicated than it really is, but these three interdependent settings are easily mastered with practice. Look for YouTubers Tony and Chelsea Northrup for fun, easy-to-understand explanations on all camera settings and use. But know that experimenting with varying settings will get you pretty far.
Read More: Winter Photography Tips for Snowshoers
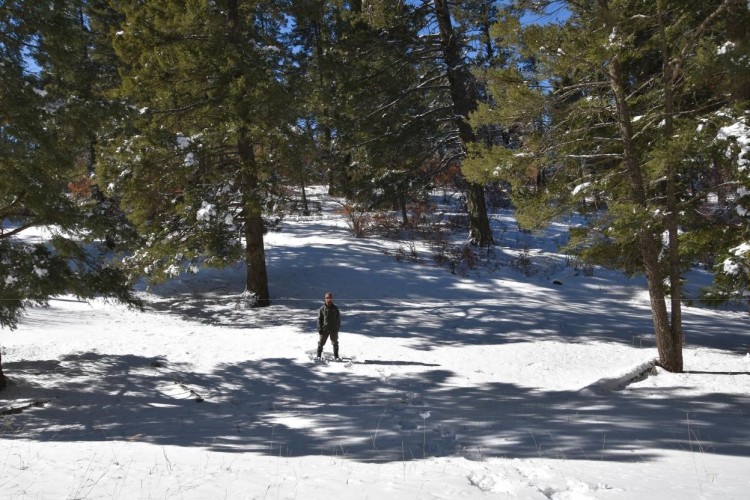
Think of contrast on a large field of white and try to include shadows on the snow like this photo at Pine Trail, Cloudcroft, New Mexico. Photo: Darrel Heller
Tips for Great Outdoor Photos
There are a few aspects to consider that will increase the likelihood of capturing your desired image. Here are a few tips to keep in mind when taking outdoor photos.
Activities and images
Plan your activity with the images you want to capture in mind.
For instance, we’re fairly certain we’ll see elk, deer, and wild horses when we choose to snowshoe or hike the innumerable trails of the Sacramento Mountains all year round. Or, we knew we’d have a great opportunity to get pictures of sandhill cranes and snow geese from November through mid-February while hiking one of a dozen trails at Bosque del Apache, Socorro, New Mexico, as shown earlier.
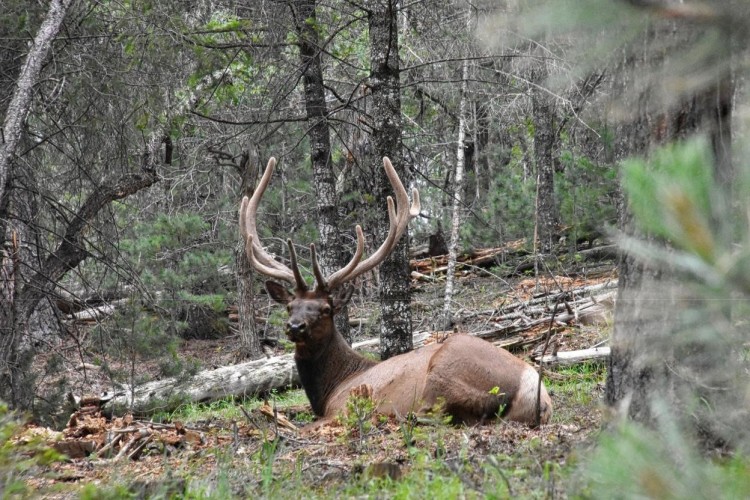
Plan your activity with the images you want to capture in mind. For example, we took a photo of this resting elk buck in the Sacramento Mountains, Cloudcroft, New Mexico. Photo: Darrel Heller
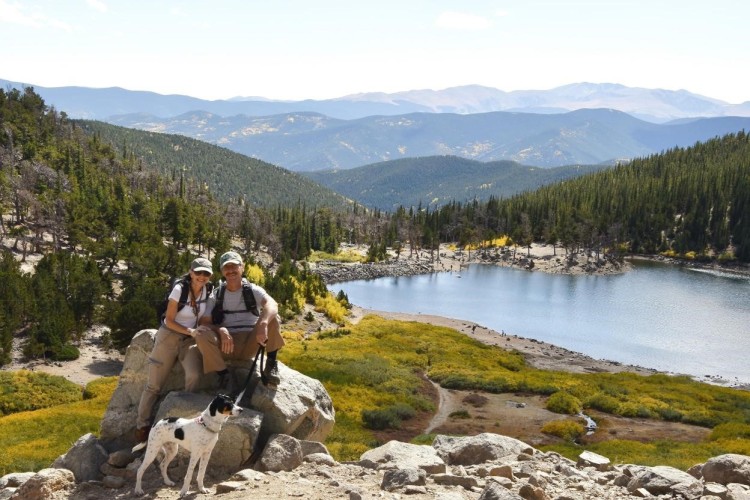
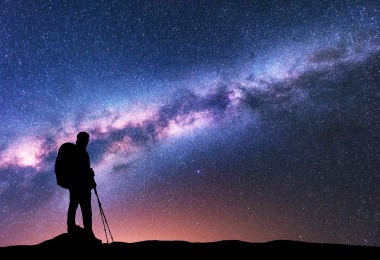
Add people
One tip for outdoor photos is to put people in your picture! This is a great way to show off the majesty of the landscape or to convey the effort invested in your sport.
A collapsible tripod (like this one) and self-timer (a simple timer on virtually all cameras and phone cameras) are very useful for getting yourself in the frame. But these items are also a good idea when using a slow shutter speed or when even the slightest vibration of pressing the shutter button will cause an unwelcome blur.
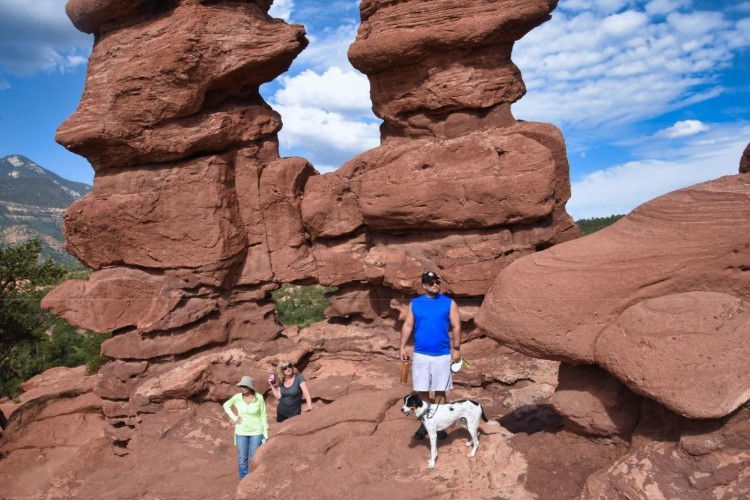
Adding people to your picture is a great way to show off the majesty of the landscape. The author’s family is pictured at Garden of the Gods, CO Springs, Colorado. Photo: Darrel Heller
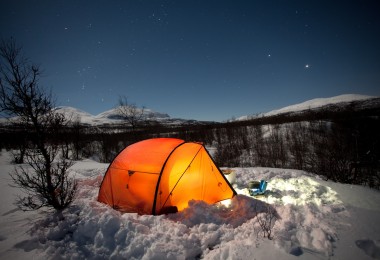
Be adaptable
Though it’s important to have an idea of what you want, be ready for anything!
We often keep our cameras on semi-automatic or auto mode when first visiting an area we’ve never been to before. This is not cheating and is often your key to capturing the one that might have got away! While hiking right outside our home last summer, we came upon our cat, Bella Fe, sitting in a clearing with a herd of elk!
Mobile photography is just great for this type of moment. Darrel didn’t even have his camera! And all the tips and most camera settings apply to my Samsung S21 Ultra. Find tons of mobile photography tutorials on Youtube. My favorite is Jonathan Casey.
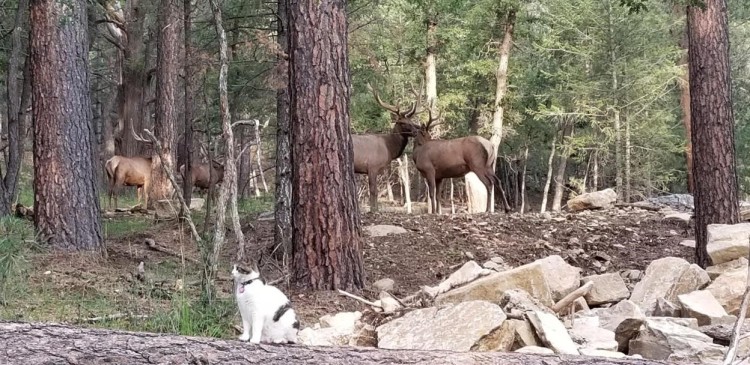
Be adaptable when taking your photos. You never know when the moment will strike! Photo: Lynda Heller
We hope you feel inspired to enter Snowshoe Magazine’s annual photo competition and enjoy the wonderful images posted by past winners!
What other tips do you have for those just beginning to learn about taking outdoor photos? Please share your thoughts with us in the comments below.
This article was first published on March 29, 2022, and was most recently updated on April 6, 2023.
Read Next: Paxis Twin Lakes Backpack Review: For the Snowshoeing Photographer
ISO is always super important, but when in outdoor pics, particularly with the sun, it is even moreso
Thank you for sharing your thoughts with us! We agree that lower ISO is essential for snowshoeing, especially on a sunny day. We hope you enjoyed the article! – Susan, Snowshoe Mag Editor