Snowshoeing is a great way to stay in shape and have a great time doing it too. There’s just something about being in nature, hiking trails covered in fresh snow that brings us back to the days of our ancestors that never had to sit in a crowded office all day. While the benefits of exercise like snowshoeing far outweigh the risks, there’s an important step that many people forget to take to help keep those risks to a minimum. Stretches for snowshoeing outings!
Stretching your muscles after exercise helps maintain your joints’ full range of motion and your muscles’ flexibility. Without it, your muscles can become tight and unable to extend fully, which can cause joint pain, muscle strain, and even muscle damage.
By making stretching part of your routine after a great day out on the trail, you’ll decrease your risk of injury while increasing your performance. There’s just one more thing to keep in mind. It’s best to stretch after a brief warm-up. For example, stretch as you’re starting your hike, once you’ve walked for about 10 minutes, or after the hike itself. Timing isn’t an exact science, so have fun with it. Try stretching once you get to your first checkpoint, the first trailhead marker, or while you’re talking with your friends about all the birch trees you saw on the trail. Mix it up.
One thing to remember, make it fun!
Read More: Chiropractor Approved Injury Prevention Tips For Snowshoers

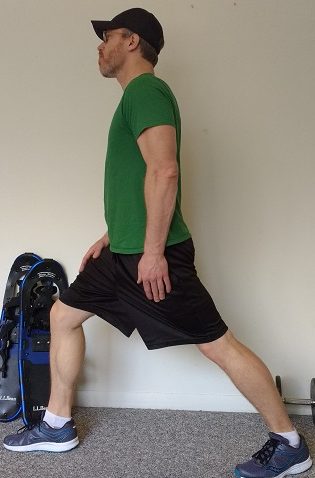
The standing quad stretch. Photo: Scott Hotaling
Pre-Outing Stretches
Here are four stretches for snowshoeing that will help you improve your flexibility and keep your muscles healthy:
1. Standing Quad Stretch
This exercise helps stretch the muscles in the front of your leg. These muscles can become quite tight, especially after a long hike.
To perform this stretch, stand up straight in a neutral position and bend your leg behind you and hold onto your ankle or foot with the opposite hand. Using your opposite hand makes it easier to keep your leg and knee straight without putting unnecessary strain on your MCL (Medial Collateral Ligament) and knee joint. Hold for 30 seconds and repeat on the other side. Do three repetitions on each leg.
2. Standing Calf Stretch
Standing calf stretch, Photo: Scott Hotaling
This exercise helps stretch the lower part of the leg, your calf, and helps reduce your risk of an Achilles tendon tear when the calf muscles (gastrocnemius and soleus) become strained and tight.
Stand up straight and place the leg you want to stretch about a foot behind your opposite leg. While keeping your back leg straight, lower your front leg as if you were doing a single leg lunge. Hold for 30 seconds and repeat with the other leg. Do three repetitions on each side.
You can also perform a variation of this stretch by placing your hands on a hard surface like a large tree or your car and lean into it until you feel the pull on your muscle. This variation provides more stability and support for those that need it.
3. Heel Drop Stretch
The heel drop is an excellent stretch for your calves, and it can quickly turn into a fun strengthening exercise for them too. If you’ve ever dived off of a diving board, this one is for you!
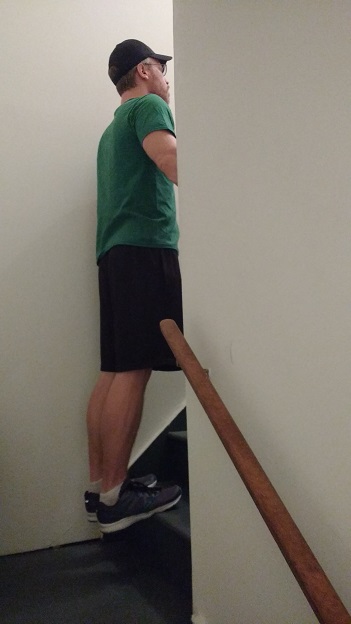
Heel drop stretch, Photo: Scott Hotaling
Position yourself with your toes on the edge of a flat raised surface like a staircase and lower your heels below you. Hold this position for 30 seconds. To improve strength, lower yourself slowly, resisting the pull of gravity until you reach the stretch. Then slowly perform a calf raise by using your calf muscles and raising yourself above the step until you’re on your toes.
A fun adventure I’d always like to go on is during a hike I’d always look for rocks I could do these exercises on. They are difficult to find sometimes because of the need for a very flat, stable surface, which made it even more exciting when I’d find one and do a few calf stretches and raises on. Plus, I’d usually have to go off of the trail (just a little bit, of course!), and who doesn’t want to take unexpected adventures off the path from time to time?
4. Standing Forward Bend
This yoga exercise also stretches the calves while stretching both the hamstrings and hips. It also helps relieve tension in your spine, back, and neck.
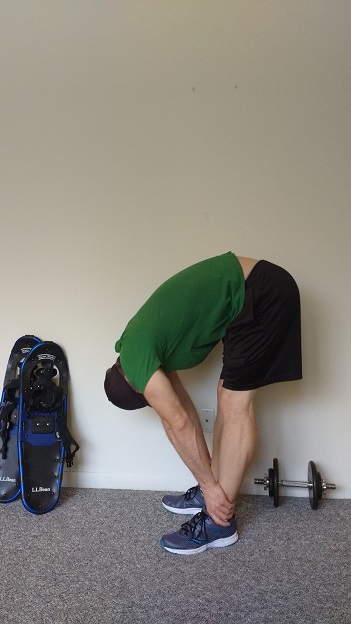
Standing forward bend. Photo: Scott Hotaling
Stand up straight and bend forward at your hips, keeping your legs straight. Run your hands down your legs as you bend forward, lengthening your torso while pressing your heels into the ground until you can touch your ankles. Hold for 30 seconds.
Go Stretch On Your Snowshoeing Outing!
Remember, it’s a lot easier to make stretching a habit if it’s fun to do. So don’t worry if you only do one or two of these exercises. You can also experiment with different variations of these stretches for snowshoeing and make them your own. The goal is to keep your muscles healthy, so the only thing that breaks down is your snowshoes!
Read Next:
Exercises To Improve Balance: One Foot At A Time
7 Exercises You Can Do To Support Your Snowshoeing


Leave a Comment