Snowshoeing participation increased by 11.4 percent from 2009 to 2010, according to Outdoor Foundation’s “Outdoor Recreation Participation Topline Report 2011.” Backpacking participation also had an increase of 9.2 percent. Both categories showed significant increases compared to several other outdoor recreation activities.

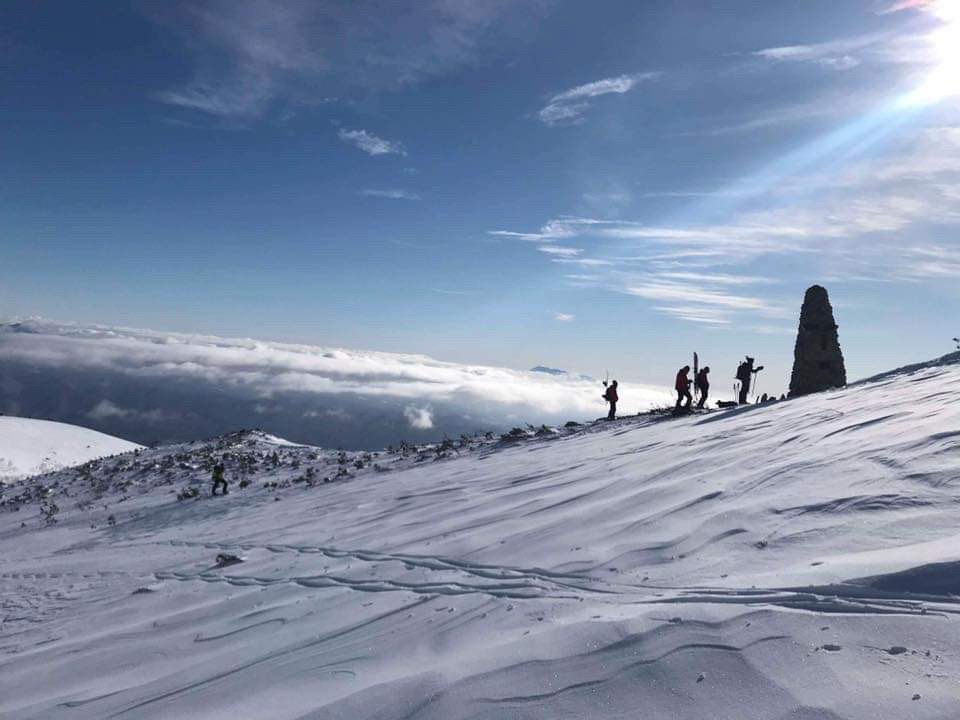
Students on the trail. Photo by Jim Joque
Although there was no category for combined snowshoeing and winter backpacking, I would venture to say that if winter enthusiasts attempted the pack-and-snowshoe experience, participation numbers in this sport would increase as well.
A few years ago on a sunny but cold winter day, college students from my adventure education course carried their backpacks while snowshoeing on a snow-covered trail in the Porcupine Mountains of Upper Michigan.
When we arrived some students set up tents and built snow walls around them. I did the same. Two of the students built a quinzhee snow shelter, and two others set up tarp shelters. A few less adventurous students decided not to take the winter plunge and stayed in a rustic cabin having only bunks and a wood stove with no other amenities. It was a challenging yet fun winter adventure.
So, what are the primary differences from backpacking in the summer and backpacking in the winter? Answer: hot and cold, bugs and no bugs, bears and no bears, and people and no people. Also…no snow and snow, and no snowshoes and snowshoes. When I make those comparisons, I almost always come up preferring winter backpacking over summer.
Three season backpackers can easily convert to a fourth season by making some adjustments to their gear, clothing and food supply. And with snow, add snowshoes among a few other winter items to your backpacking gear list. The pack may be a little heavier, but you do not necessarily have to carry it as far as you do in the summer.
The best laid plans
I recall the motto from my Boy Scout days….”be prepared.” And, knowing the first Leave-No-Trace principle to be “plan ahead and prepare,” I find it imperative to plan and prepare for a winter backpacking adventure.

Students getting ready for the trip. Photo by Jim Joque
First do a risk assessment. Identify and list potential risks that could occur when backpacking on snowshoes in the area you plan to travel. Such as cold weather risks like hypothermia and frostbite, hiking risks such as falls or injuries, and equipment risks like inoperative stoves or broken binding on a snowshoe.
Then identify what precautionary measures can be taken to prevent problems. Such as, take along quality winter clothing and gear, know your limits and skills for winter travel, and take along cold weather security items such as a stove, fire starter, space blanket and first aid kit. And, check all gear prior to leaving to assure everything is in working order.
Second, plan your trip. Work out travel logistics, create a budget, make a gear list and plan meals. Take along enough food for a winter trip. The National Outdoor Leadership School uses a system called “bulk rationing” that includes an estimated two to two-quarter pounds of food per person per day, equaling about 3,500 to 4,500 calories per person per day. I bring food with some fat content like cheese, sausage and crackers. Pasta and rice dishes are high in carbohydrates and are good food for winter. Granola bars and other snacks help bulk up calories.
Since water filters freeze up in very cold temperatures and chemical treatment does not work well in cold water, I carry more water with me than usual. But I have melted snow and boiled water on occasion too.
As far as gear, plan on carrying more weight than you would in summer. I pack a winter zero-degree sleeping bag. This weighs more than my summer bag. I also carry a closed-cell self-inflatable sleeping pad along with a second open-cell foam pad for additional insulation. And my Sierra Design Omega 4-season tent weighs about three pounds more than my summer tent. This gear adds weight to the pack, but also adds comfort and safety from wind and snow.
And finally, I carry more clothing. In winter, I always take my long-johns, fleece pants and a wool sweater for sleeping, my waterproof breathable jacket and bibs, socks, winter caps, gloves and a full change of winter clothing. My clothing weight more than doubles in winter. By adding all my winter gear, my 35 pound summer pack now becomes a 45 to 50 pound winter pack.
But, you do not want to carry a “monster-load” on your back when on snowshoes. You do have to set limits and keep your pack weight within about 25 percent of your body weight. It will however, come close to maximizing that percentage when winter backpacking.
Have snowshoe will travel
My preferred mode of travel while backpacking in snow is on snowshoes. And when selecting the appropriate shoes for the trip, I choose a pair that is compatible with my winter travel weight.
When adding my winter pack to my 180 pound body weight, my snowshoes now need to accommodate a 230 pound backpacker.
There are so many styles and brands on the market to choose from. I have backpacked with people who prefer wood-framed traditional snowshoes. Others backpack on aluminum-frame or plastic mold shoes. I favor my aluminum-frame Northern Lites Backcountry snowshoes that are designed to provide adequate floatation for up to 250 pounds.
In choosing a brand of snowshoe for backpacking, reference the manufacturer’s recommended style and weight rating for backpacking and backcountry travel. The shoes may be a little larger than those used for recreational trails, running or racing. However, some recreation trail styles may work well for backpacking, depending on the weight capacity and snow conditions.
Also consider a shoe with bindings that provide you easy in and out, and offers stability for when you are carrying that extra load. Brands that have good traction devices are important as well, especially if hiking on hilly or mountainous terrain.
It’s all in how you do it
A challenge I give to my students when winter backpacking and camping is to see who can keep their water bottles from freezing. Some succeed and some do not. While hiking, do not fill the bottle full to allow water movement, and carry it upside down to keep the lid from freezing.
I recommend at night keeping water bottles close to the body. I keep mine under my knees and between my pad and my sleeping bag. Some heat the water and keep the bottle in their bag with them. I recall one student followed my suggestion of burying his bottles in two feet of snow. He was surprised it did not freeze in zero degree temperatures.
Keeping warm at night is another challenge. Rely on body heat. Although, some winter campers use heated water bottles, a heated rock in a sock, or chemical hand-warmers in a sock to help provide some added heat. A granola bar before crawling into your tent adds fuel to the body. And during the night when chilled, try sit-ups or rolling over vigorously to help warm up.
Additionally, dry clothing is essential for a comfortable nights slumber. I always change all my clothing at night before crawling in my sleeping bag. Keeping dry is critical for winter camping. Hiking and setting up camp will result in perspiring and damp clothing. So change clothes following these activities. And take extra wool-synthetic blend socks and change when needed. Wet feet are a no-no for winter backpacking.
Campfires are essential when winter camping too. They become your primary heat source, especially when sitting around camp idle, and just before crawling into your tent for the night. Bring a commercial or natural fire starter along to help get a winter fire going.

Gathering around a fire for warmth after a long hike. Photo by Jim Joque
One last concern when winter backpacking is to know that you have shorter days. Not only do you lose light, but the temperatures can drop drastically. It is important to plan for longer periods of dark by bringing adequate lighting and planning evening activities to help keep animated and warm. Searching for firewood can be one such activity.
Location, location, location
As realtors will tell you, your success for selling a home depends on “location, location, location.” It is the same with finding an ideal place to set up camp in the winter.
Consider a camping location close to home for your first winter adventure. The beginner needs a safety net in case of an emergency or for when they need to get out of the cold. A nearby park is a good start.
For those with some snow camping experience, you do not need to hike far to enjoy the winter pack-and-snowshoe experience. One to three miles from your trailhead is a good distance to get the feel for the backcountry, and still have that safe feeling of knowing you could snowshoe out in a relatively short time if needed.
One of my most memorable trips was one that was close to home. College students in my backpacking class were scheduled to take our winter weekend fieldtrip to a wilderness area about three hour north of the university. I checked the weather reports prior to our trip and a major snow storm was heading our way. Not wanting to take a chance of getting snowbound in route up north, I made a change of plans and decided to lead the trip locally.
I selected a local county park about 30 miles from campus. We arrived at the parking lot and unloaded our packs from the vans. Since there was no snow on the ground, my students thought it was strange when I told them to strap snowshoes onto the back of their packs. Although they knew a storm was coming, they thought it would not be of any major substance. So, why carry snowshoes only to have to carry them out. We hiked on a trail about two miles to our campsites.
Students set up camp there and prepared supper. Shortly after, it began to snow, and snow and snow. In the morning there was a foot of fresh snow on the ground. I woke up with a tap on my tent by two young women who were wearing their snowshoes and a smile. After taking down camp and snowshoeing back to the vans, students were enjoying the moment. I heard comments that this was the “coolest” thing they experienced…hiking in carrying snowshoes and hiking out wearing them in snow.
Shelter, shelter, shelter
Wilderness survival expert, Tom Brown, Jr. once wrote “I can hardly overstress the importance of shelter. Like your own home, a good one will protect you, maintain your body heat, and provide a place you can identify with.” For winter camping, your shelter is your temporary home. So, you want it to protect you by keeping you warm and dry.
Although there are many shelter options, the two types I recommend for the pack and snowshoe experience are tents and quinzhees.

Setting up camp and a tent. Photo by Jim Joque
In putting up a tent for winter camping, use your snowshoes to stamp out a platform in the snow. Let it set for an hour or two while doing other tasks around camp. This will give the snow time to harden. Place your tarp on the platform and set up your tent on top of it. Keep your entrance at a right angle to the wind. Then pile snow up around the tent about two-feet high or more, pushing it slightly away from the wall from the inside. This provides a wind barrier and helps keep body heat inside your tent. Leave the door area free of snow and put up a small snow-wall a few feet away from the entry.
The quinzhee is a burrowed-out snow shelter. Although time-consuming and challenging to build, they can be the best protection from cold and inclement winter weather. It is good to know a few basic laws of physics when building a quinzhee. First, snow insulates. So, it is feasible to sleep surrounded by snow as long as you use adequate winter sleeping gear.

Setting up the quinzhee for our stay. Photo by Jim Joque
Secondly, snow density changes with time and pressure. Use a shovel or a snowshoe, and pile snow high and wide….about 6 feet high in a 10-foot diameter area. Poke several 2-foot long sticks into the pile at the top and around the upper sides. These sticks become guides for digging out your quinzhee so that you do not carve too close to the surface. Pack it a bit with your hands if the snow is soft. Otherwise, let the snow compact naturally.
Then let it sit for a few hours. The snow will firm up so that you can hollow out your quinzhee. Using a small but solid shovel, dig an entrance low and relatively small, working your way up and then into the mound. Be careful to cut small chunks of snow without prying in order to keep from putting stress on the wall.
The third factor is that an arch will support better than a 90-degree angled space. So, dig out a dome-shaped room inside the mound, digging no closer than one and a half to two feet from the surface. Smooth out the surface inside the structure. It should harden nicely.
The fourth is that cold air falls. Have your sleeping area slightly elevated from the floor of your structure so that cold air will fall from that area. Fifth, cold ground underneath you will pull warmth from your body unless insulated. Sleep on a tarp followed by a good insulating sleeping pad, and use a winter-rated sleeping bag. Wear warm winter clothing.
And finally, humans need oxygen to breath. It is critical to make three or four air holes through the roof or side-wall of your quinzhee. The air vents also help body-produced moisture to escape. And, sleep with your shovel next to you just in case of a cave-in.
Play it safe, safe, safe
The late Paul Petzoldt, founder of the National Outdoor Leadership School once wrote, “Winter camping and mountaineering must be near perfect to be enjoyable and safe.” To enjoy and play it safe for winter pack-and-snowshoe enthusiasts, I recommend the following:
•Have three-season camping experiences prior to attempting winter camping
•Gain some snowshoeing experience prior to backpacking on snowshoes
•Select a familiar location close to home and backpack only a short distance
•Do not go alone; find another winter enthusiast to go with you
•Check the weather predictions before leaving; do not go if too cold or risky (I will not go if below minus 5 degrees)
•Have adequate sleeping gear and clothing to keep warm and dry; and dress in layers
•Plan and prepare, do a risk assessment, and take along a first aid kit
•Inform someone of your whereabouts and when you plan to return
•Bring plenty of food and water; keep your water from freezing
•Bring or build an adequate shelter; if planning a snow shelter, take along a tent as backup
•Bring what you need to make a campfire for warmth or use a camp stove
•Use various techniques for keeping warm at night
•Do not take any unnecessary risks and use good judgment
And finally, practice Leave-No-Trace principles while backpacking on snowshoes. Pack it in and pack it out. Although snow is a durable surface for traveling and camping, be sure to respect the snow-covered backcountry in which you are traveling. Again, use good judgment.


Leave a Comment